Organize your research data in moderated studies
Last updated: June 24, 2026
Unlock the full potential of moderated research. Maze moderated studies allows your team to streamline analysis and sharing of insights from user interviews.
Add a new session
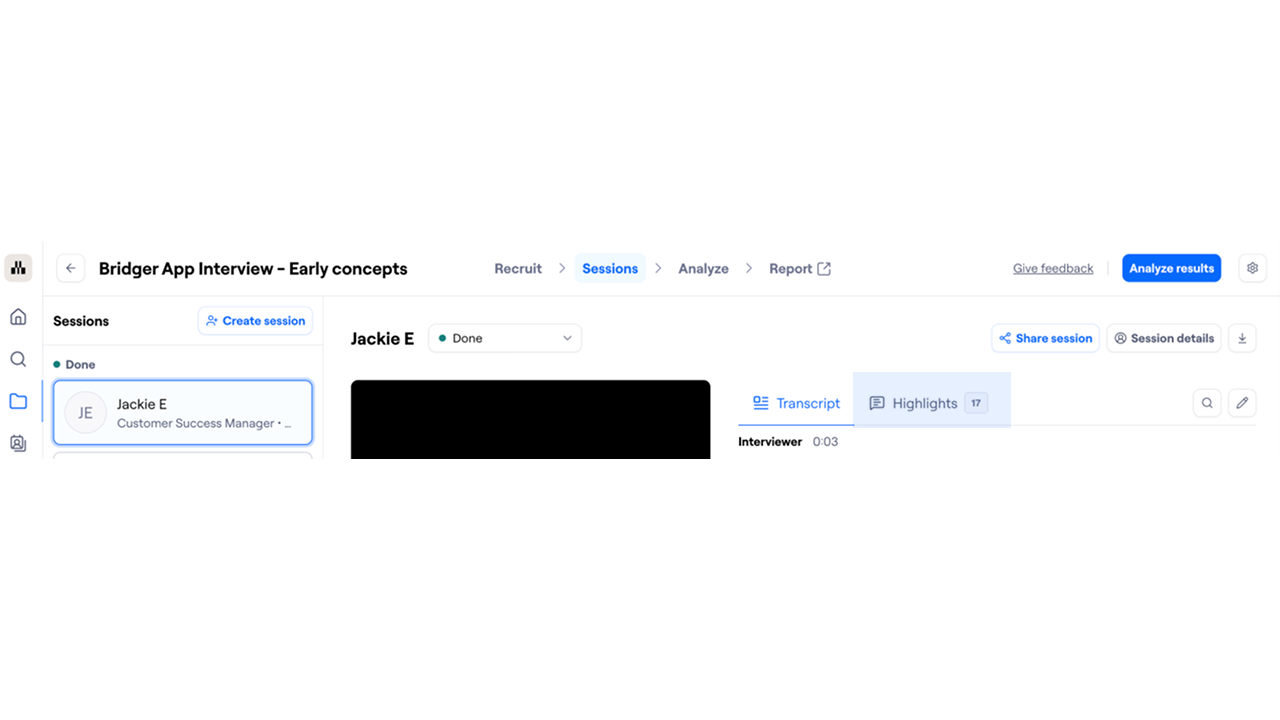
On the Sessions tab, you can add and manage individual sessions. There's no limit on the number of sessions you can add to a study.

To add a session:
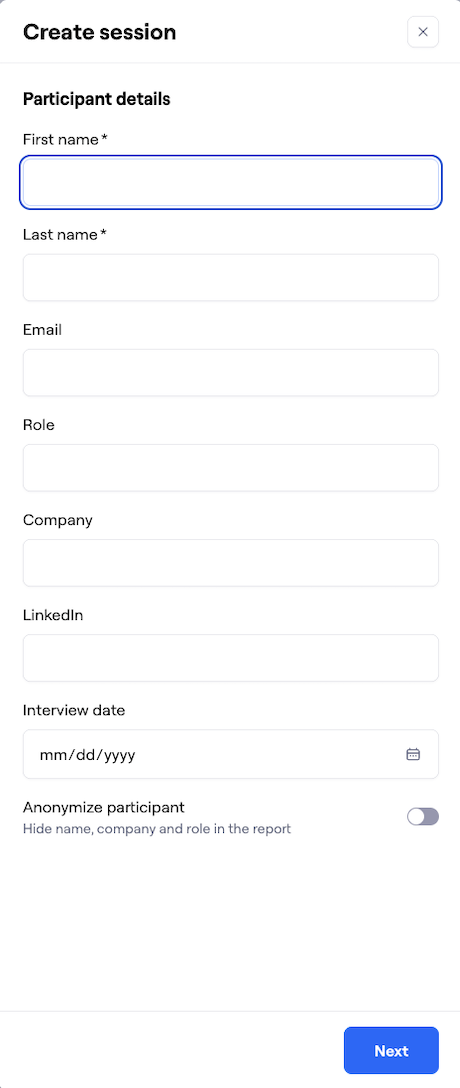
On the study page, click Create session.

Enter the participant’s details: name, email, company, and role.
If needed, you can anonymize the participant by clicking the toggle Hide name, company, and role in the report and entering an alias for that participant.
When you’re ready, click Next.
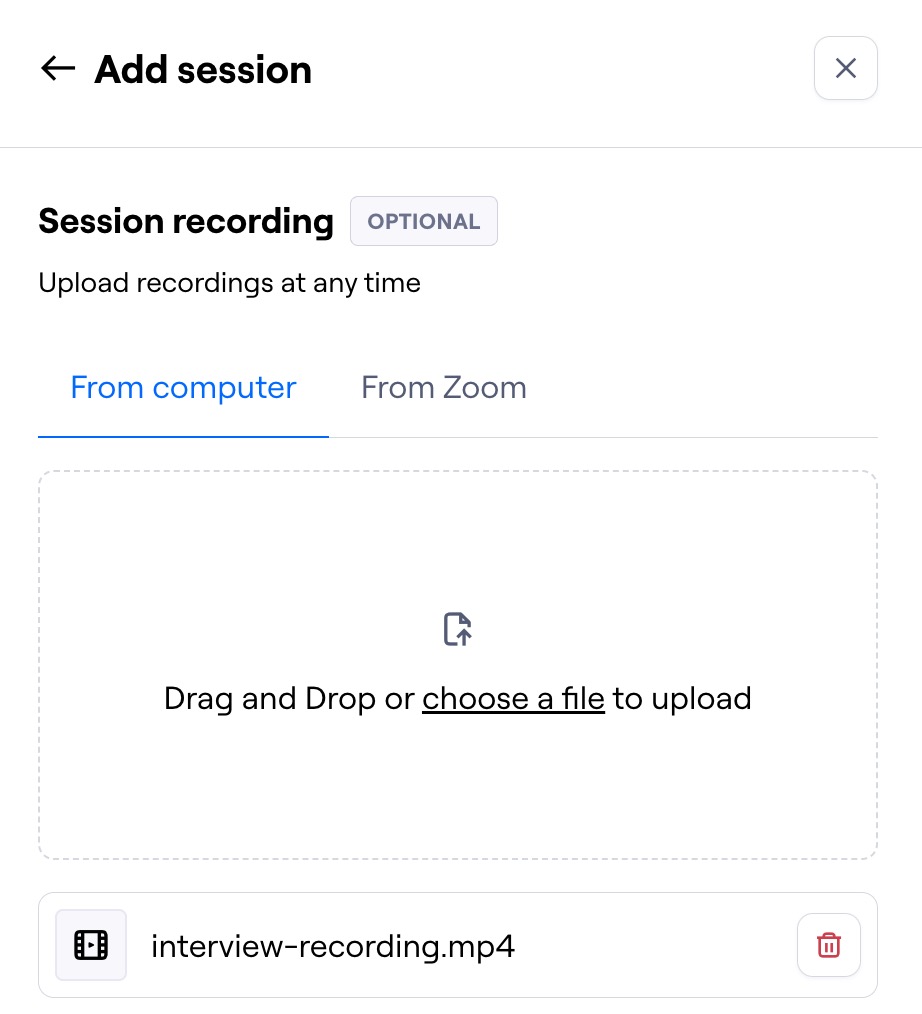
Upload session recordings (Optional)
You can import your recordings manually or through the Zoom integration. You can always go back to the session later to add recordings.
Learn best practices for importing media files
From computer: To upload files manually, drag and drop them into the modal.
From Zoom: After connecting the Zoom integration for the first time, you can select the relevant meeting recording. Learn how to set up the Zoom integration
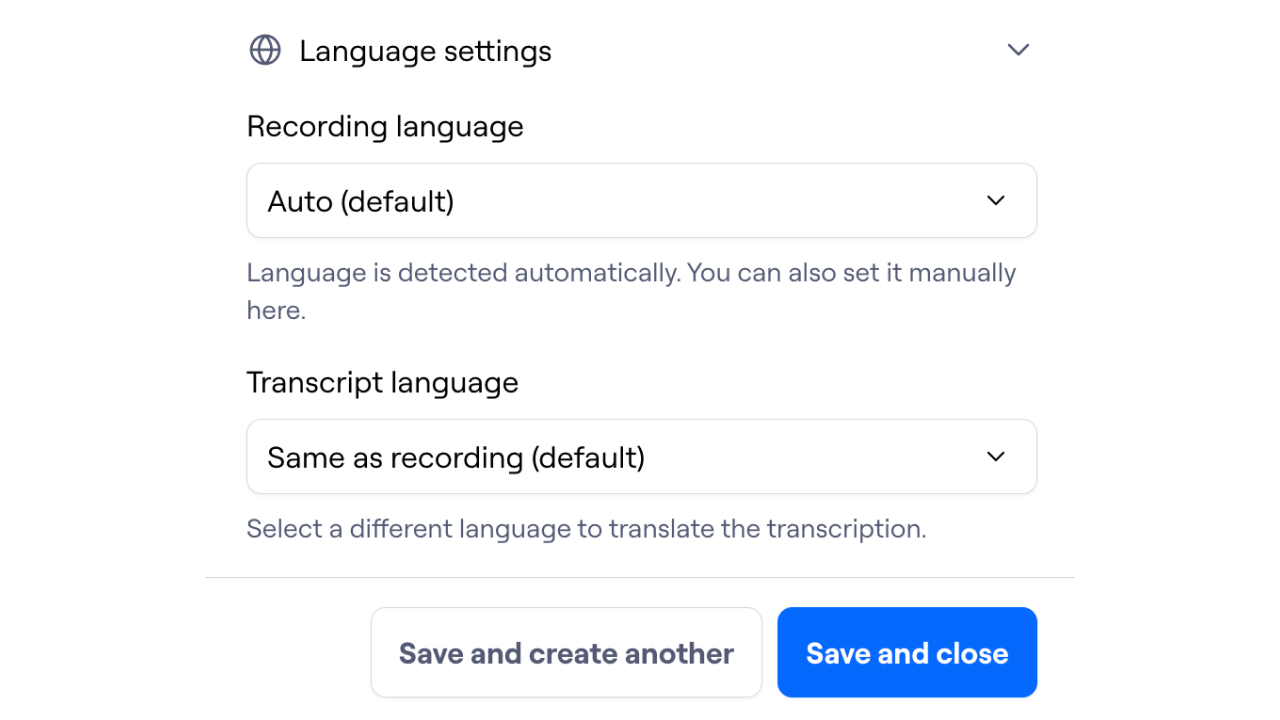
By default, the recording language is auto-detected, and the transcript is generated in the same language. This means that, if your interview is in English, the transcript is generated in English. If needed, you can manually set the recording language and the transcript language in the Language settings. This allows you, for example, to generate an English transcript for a Spanish-speaking interview.
It’s not possible to change the language settings after the transcript is created. However, you can add the recording multiple times to the same session, if you would like to have transcripts in multiple languages.
Click the Save and close button to go back to the Sessions page.
Please note:
The recordings may take a few minutes to upload. While the upload is in progress, you’ll see a progress bar next to each session.
You can upload up to 100 recordings per month.
If you have recordings from Clips, you can export them, then manually upload them to your sessions to generate transcriptions and analyze/share insights.
See transcripts of your recordings
After importing the recording, a full transcript and a summary are automatically generated after a few minutes.
Maze can create transcripts and summaries for recordings in 30+ languages. Learn more about supported languages
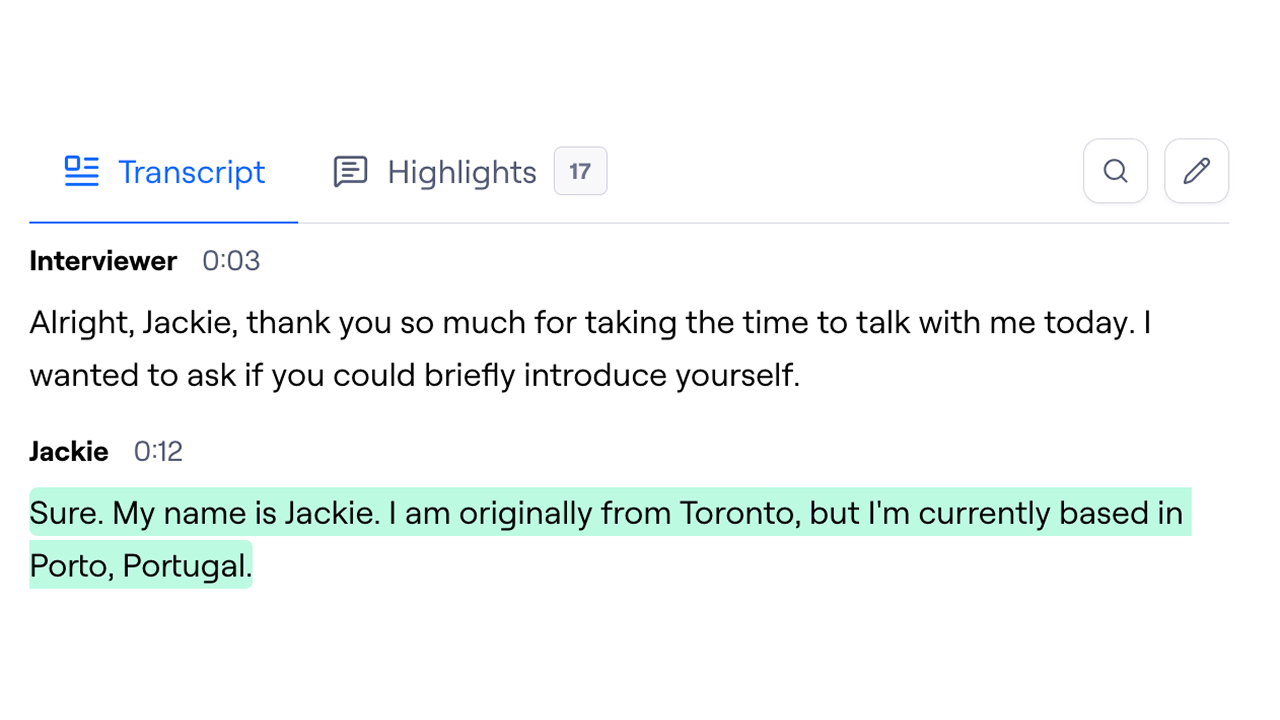
Transcript
After importing the recording, a full transcript is automatically generated after a few minutes.
Click the relevant section of the transcript to jump to the corresponding point in the recording.
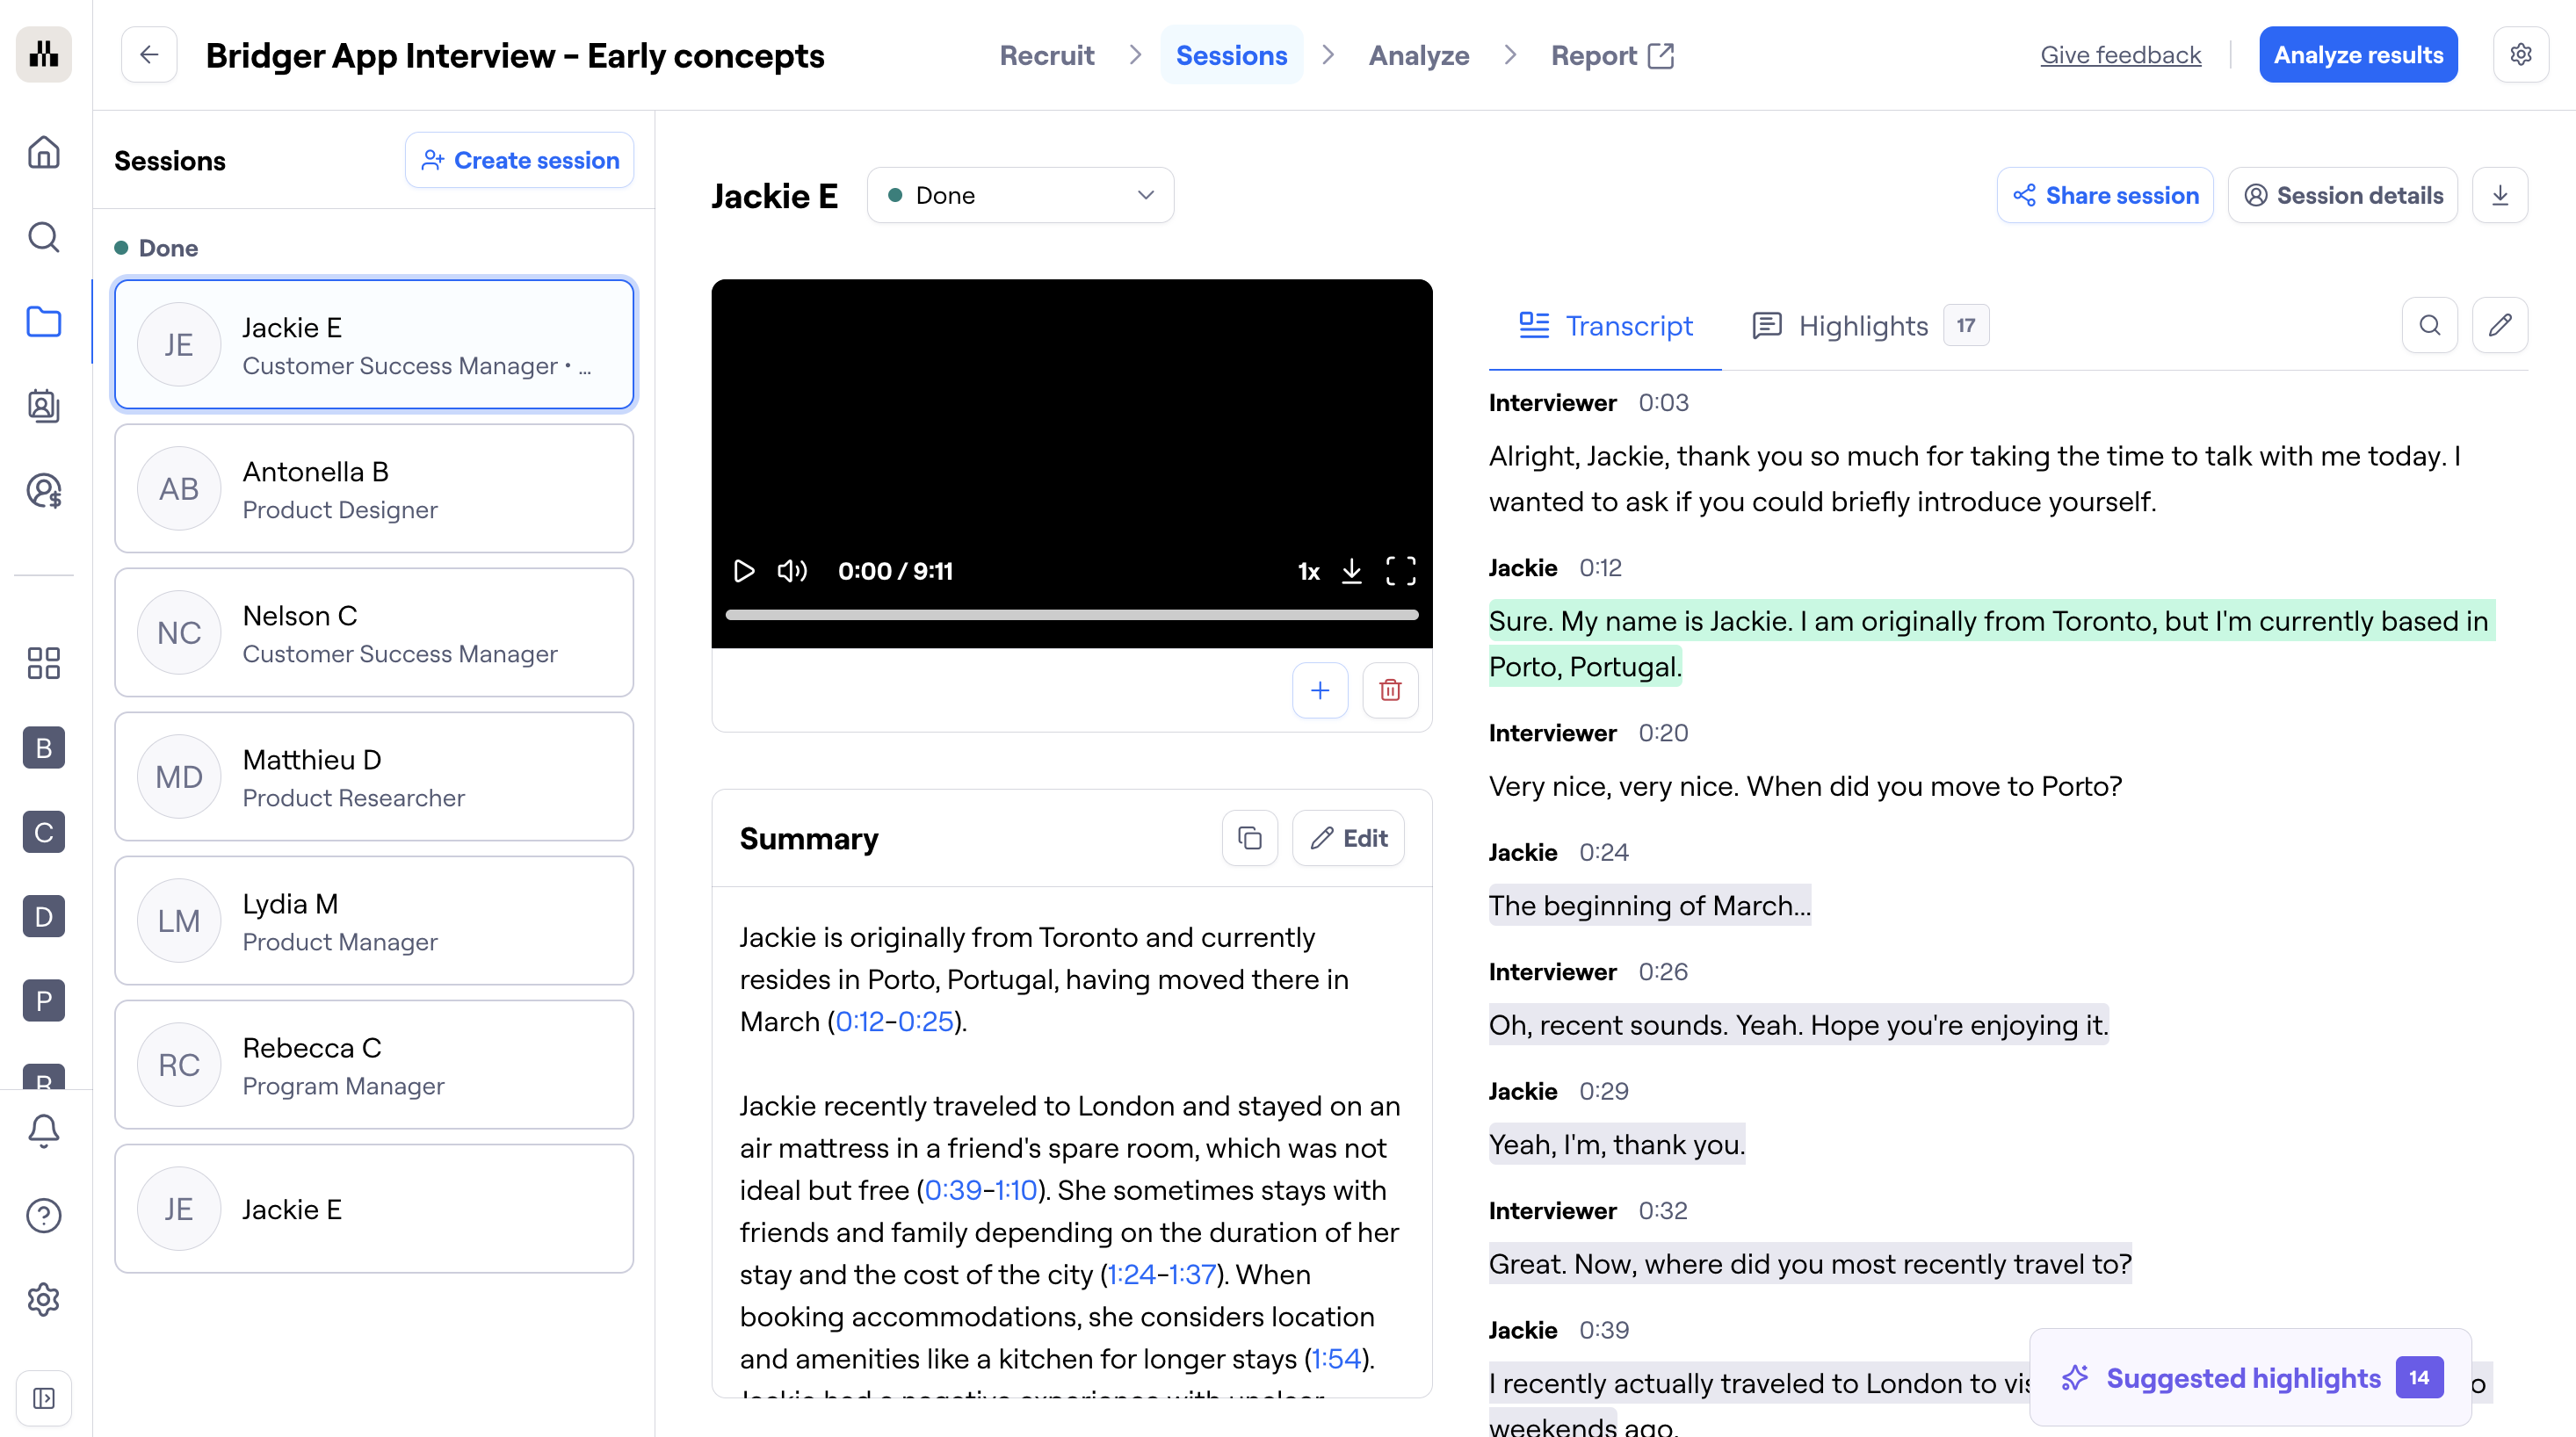
Once the transcript is generated, there is the ability to search and edit. This is helpful to correct any portions that weren't transcribed accurately.
Transcript Downloads
Export options are available for your moderated session recordings. You can download the recording of your sessions, the txt transcripts, or a reel with all highlights from your session. More details on transcript downloads for moderated studies here.
Transcript translation
You can have Maze automatically translate transcripts into a language of your choice. This is useful when your team works in a different language than your participants, or when you want all research stored in a single language across studies.
Translation can be configured at two levels:
Team default — set once in Team Settings, applied to every new study automatically
Per study — set in Study settings, useful when a specific study needs a different language than the team default
Set a team-level translation default
Go to Team Settings.
In the left sidebar, click Transcripts.
Under Translate transcripts to, select your preferred language from the dropdown.

The selected language applies to all new studies. Existing studies are unaffected.
Set a translation language for a specific study
Open the study and click the Settings icon to open Study settings.
Under the Transcripts section, find Translate transcripts to and select a language from the dropdown.

This only affects the current study — your team's default is unchanged. If no team default has been set, the dropdown shows No translation by default.
Transcript translation is applied when the transcript is first generated. Changing the language setting after a transcript has been created won't re-translate existing transcripts.
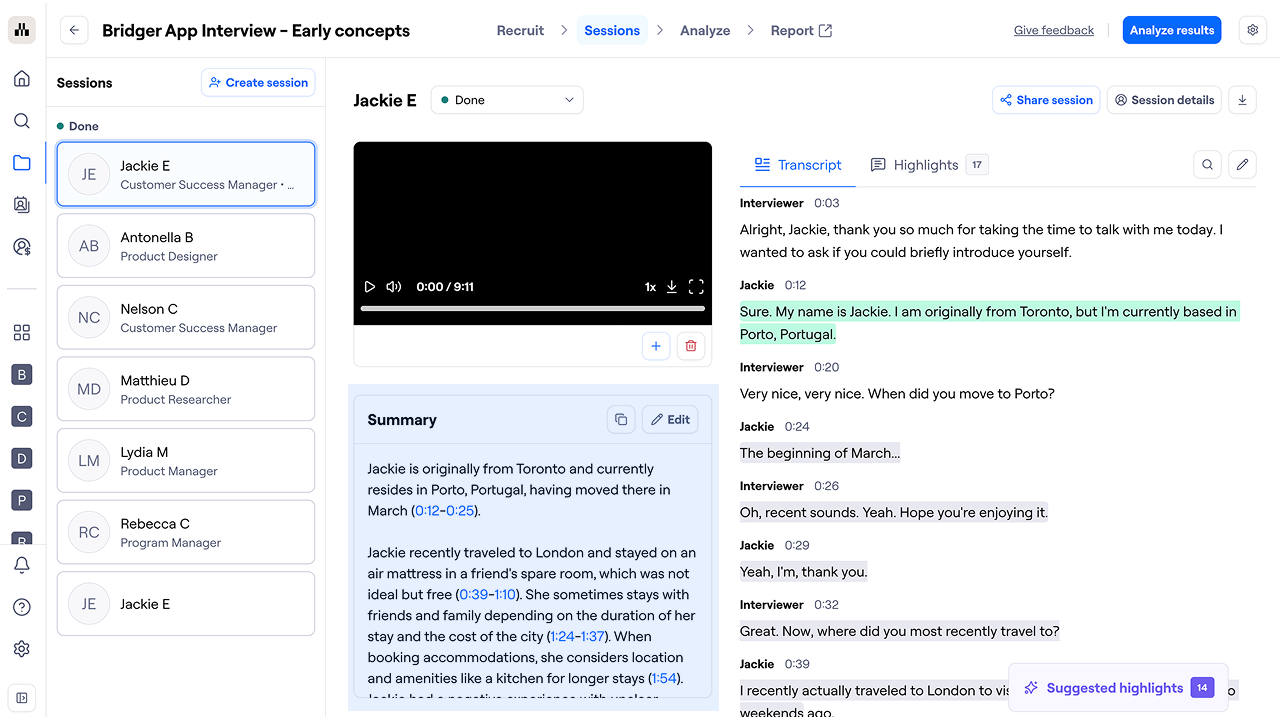
Summary
From the transcript, Maze also generates a summary of the session to make the content more accessible at a glance.
The summary offers a quick overview of the participant and the topics covered in the session. Timestamps are included, so you can quickly jump to the relevant places in the recording/transcript.
The summary is available on the session page and on the session report page.
Process interviews & create highlights
A highlight is an observation made during an interview that carries a particular weight and value.
Highlights can be associated with themes — a concise way to describe and categorize your highlights.
Clustering your highlights into themes makes it easy to find all highlights associated with a theme and identify patterns across sessions. Documenting highlights and common themes in Maze makes it a breeze to extract insights across sessions and share them with your stakeholders.
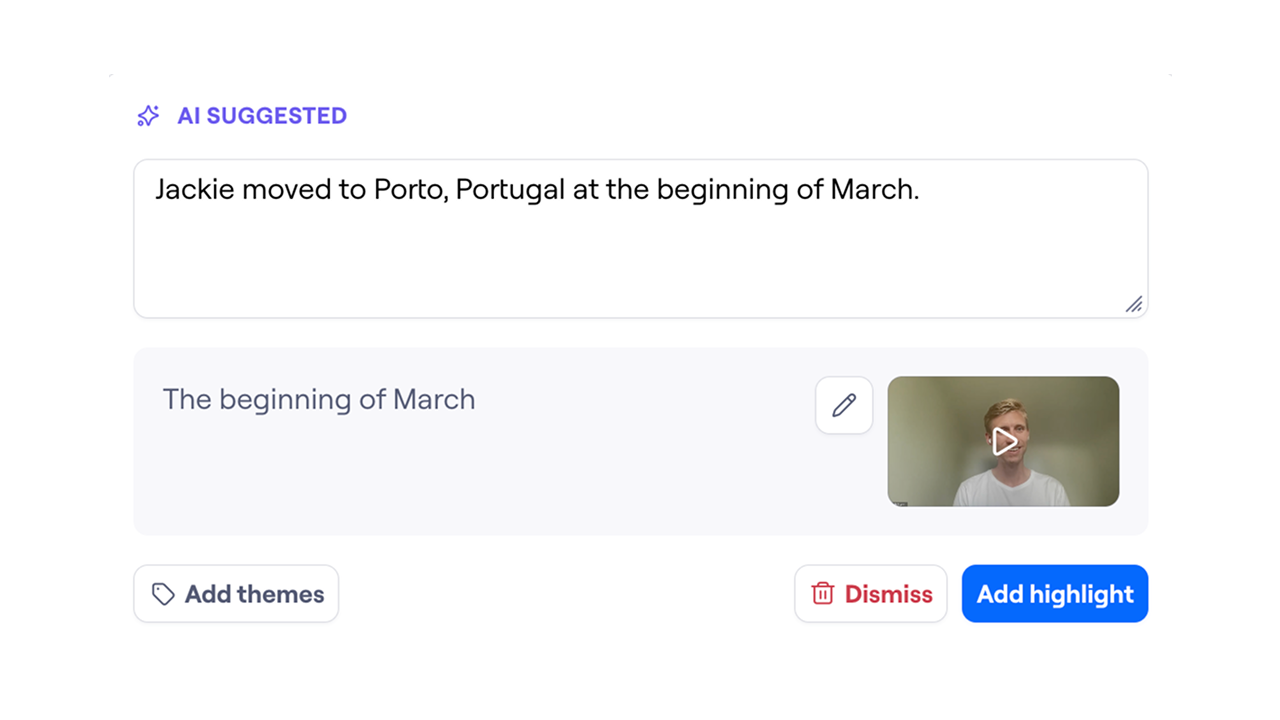
Suggested highlights
After the transcript is generated, the AI assistant will review it and automatically suggest highlights.
Click Suggested highlights to review each suggestion.
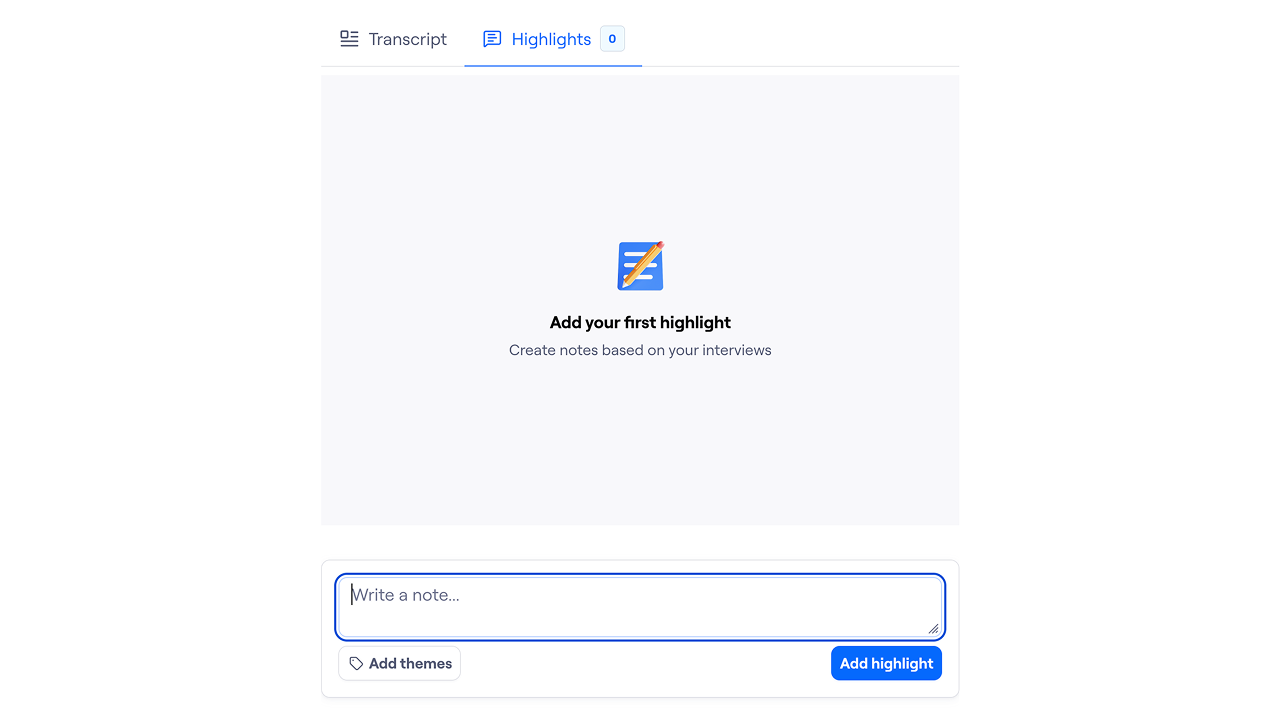
View highlights
Open the Highlights tab on the Sessions page to view the highlights for that session.
Add highlights manually
To add a new highlight:
In the Sessions page, open the Highlights tab.
Enter your highlight.
If needed, assign the highlight to one or more themes.
To save, click Add highlight.
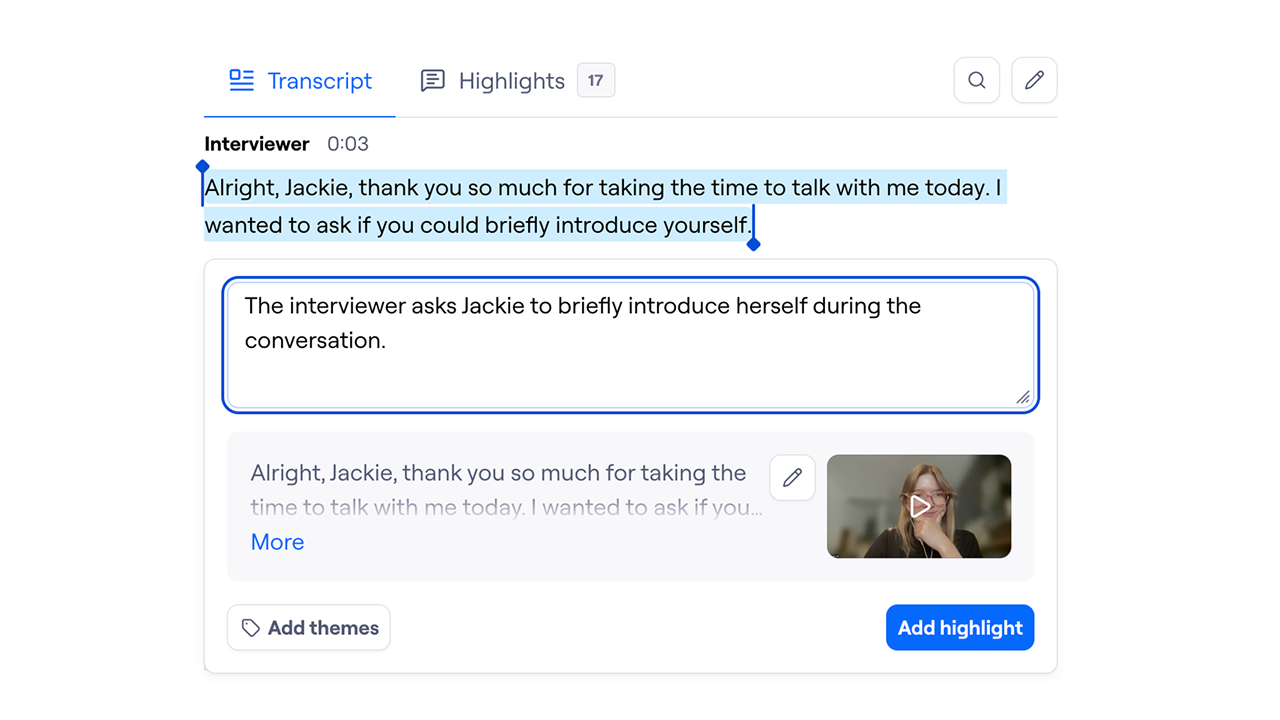
You can also create a highlight from a quote in the transcript. This automatically generates a video/audio clip of that excerpt. Here’s how:
Highlight the relevant section of the transcript.
If the highlighted quote is long enough, the AI assistant will automatically generate a note. You can edit the note as needed.
You can also make small edits to the actual quote to remove imperfections.
If needed, assign the highlight to one or more themes.
To save, click Add highlight.
Create a session highlight reel
Highlight reels make it easy to share the most important feedback and quotes from interview sessions with your team.
You can create a highlight reel for a session by:
Opening the participant session you want to use.
Clicking the Add to reel button on the highlight.
Dragging the highlight from the Highlights section into the Highlights reel section.
Customizing a session highlight reel
Once your highlights are in a reel, you can adjust and organize them to best fit your audience.
Trim or expand highlights to include exactly the moments you want.
Reorder highlights in your reel using drag and drop.
Remove highlights from your reel by either:
Clicking the Remove from reel button on the highlight, or
Dragging the highlight from the Highlights reel section back into the Highlights section.
Share highlights
You can share links to specific highlights with your team. This can be especially useful when you want to support a point with a real-world example.
View session report
Adding the first highlight makes results and reports available.
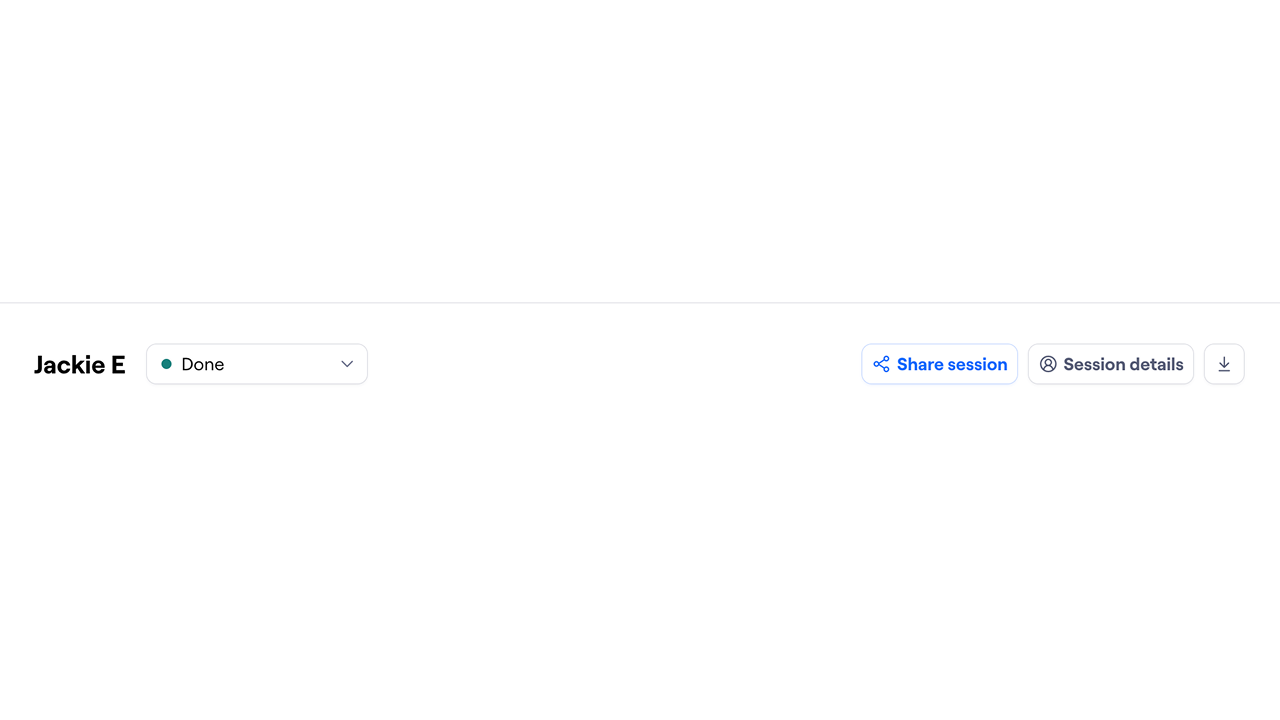
From the session page, click Share session to access the corresponding session page in the report.
Learn more about results & reporting in moderated studies
Deleting data
You can delete recordings, sessions, or entire interviews that you no longer need.
Learn more about deleting participant data in moderated studies
Still need help?
If you have any questions or concerns, please let our Support team know — we'll be happy to help!