How to test multiple flows using a single Figma prototype
Last updated: June 25, 2026
It’s only possible to import one prototype per maze. This is important to remember when testing different prototype flows in Maze. For example, when using a variant comparison block or several prototype test blocks.
After importing the prototype, it’ll be linked to all prototype blocks. This means that the imported page must include all the flows you want to test.
This article provides tips on how to efficiently manage and test multiple flows within one prototype.
Step 1: Set up your Figma page
The first step is to make sure all your prototype flows are included within the same Figma page. This will allow you to access these flows when setting up the test with the imported prototype.
A few tips:
Properly naming your Figma frames simplifies the process of managing and identifying different flows within a single prototype. Use clear and descriptive names for each frame. You may also use consistent prefixes/suffixes to categorize frames belonging to specific flows. Examples: "Signup-Start", "Checkout-Step-1”
Your flows should be properly defined in Figma, and frames are accessible via interactions. Learn more in the Figma documentation
You’ll still want to make sure that your page is optimized for testing with Maze. Learn more about creating a dedicated page to test Figma prototypes in Maze
Step 2: Import the prototype into Maze
Import by copying and pasting the prototype link, bringing in flows and screens by default.
Learn more about importing Figma prototypes
Step 3: Set up tasks
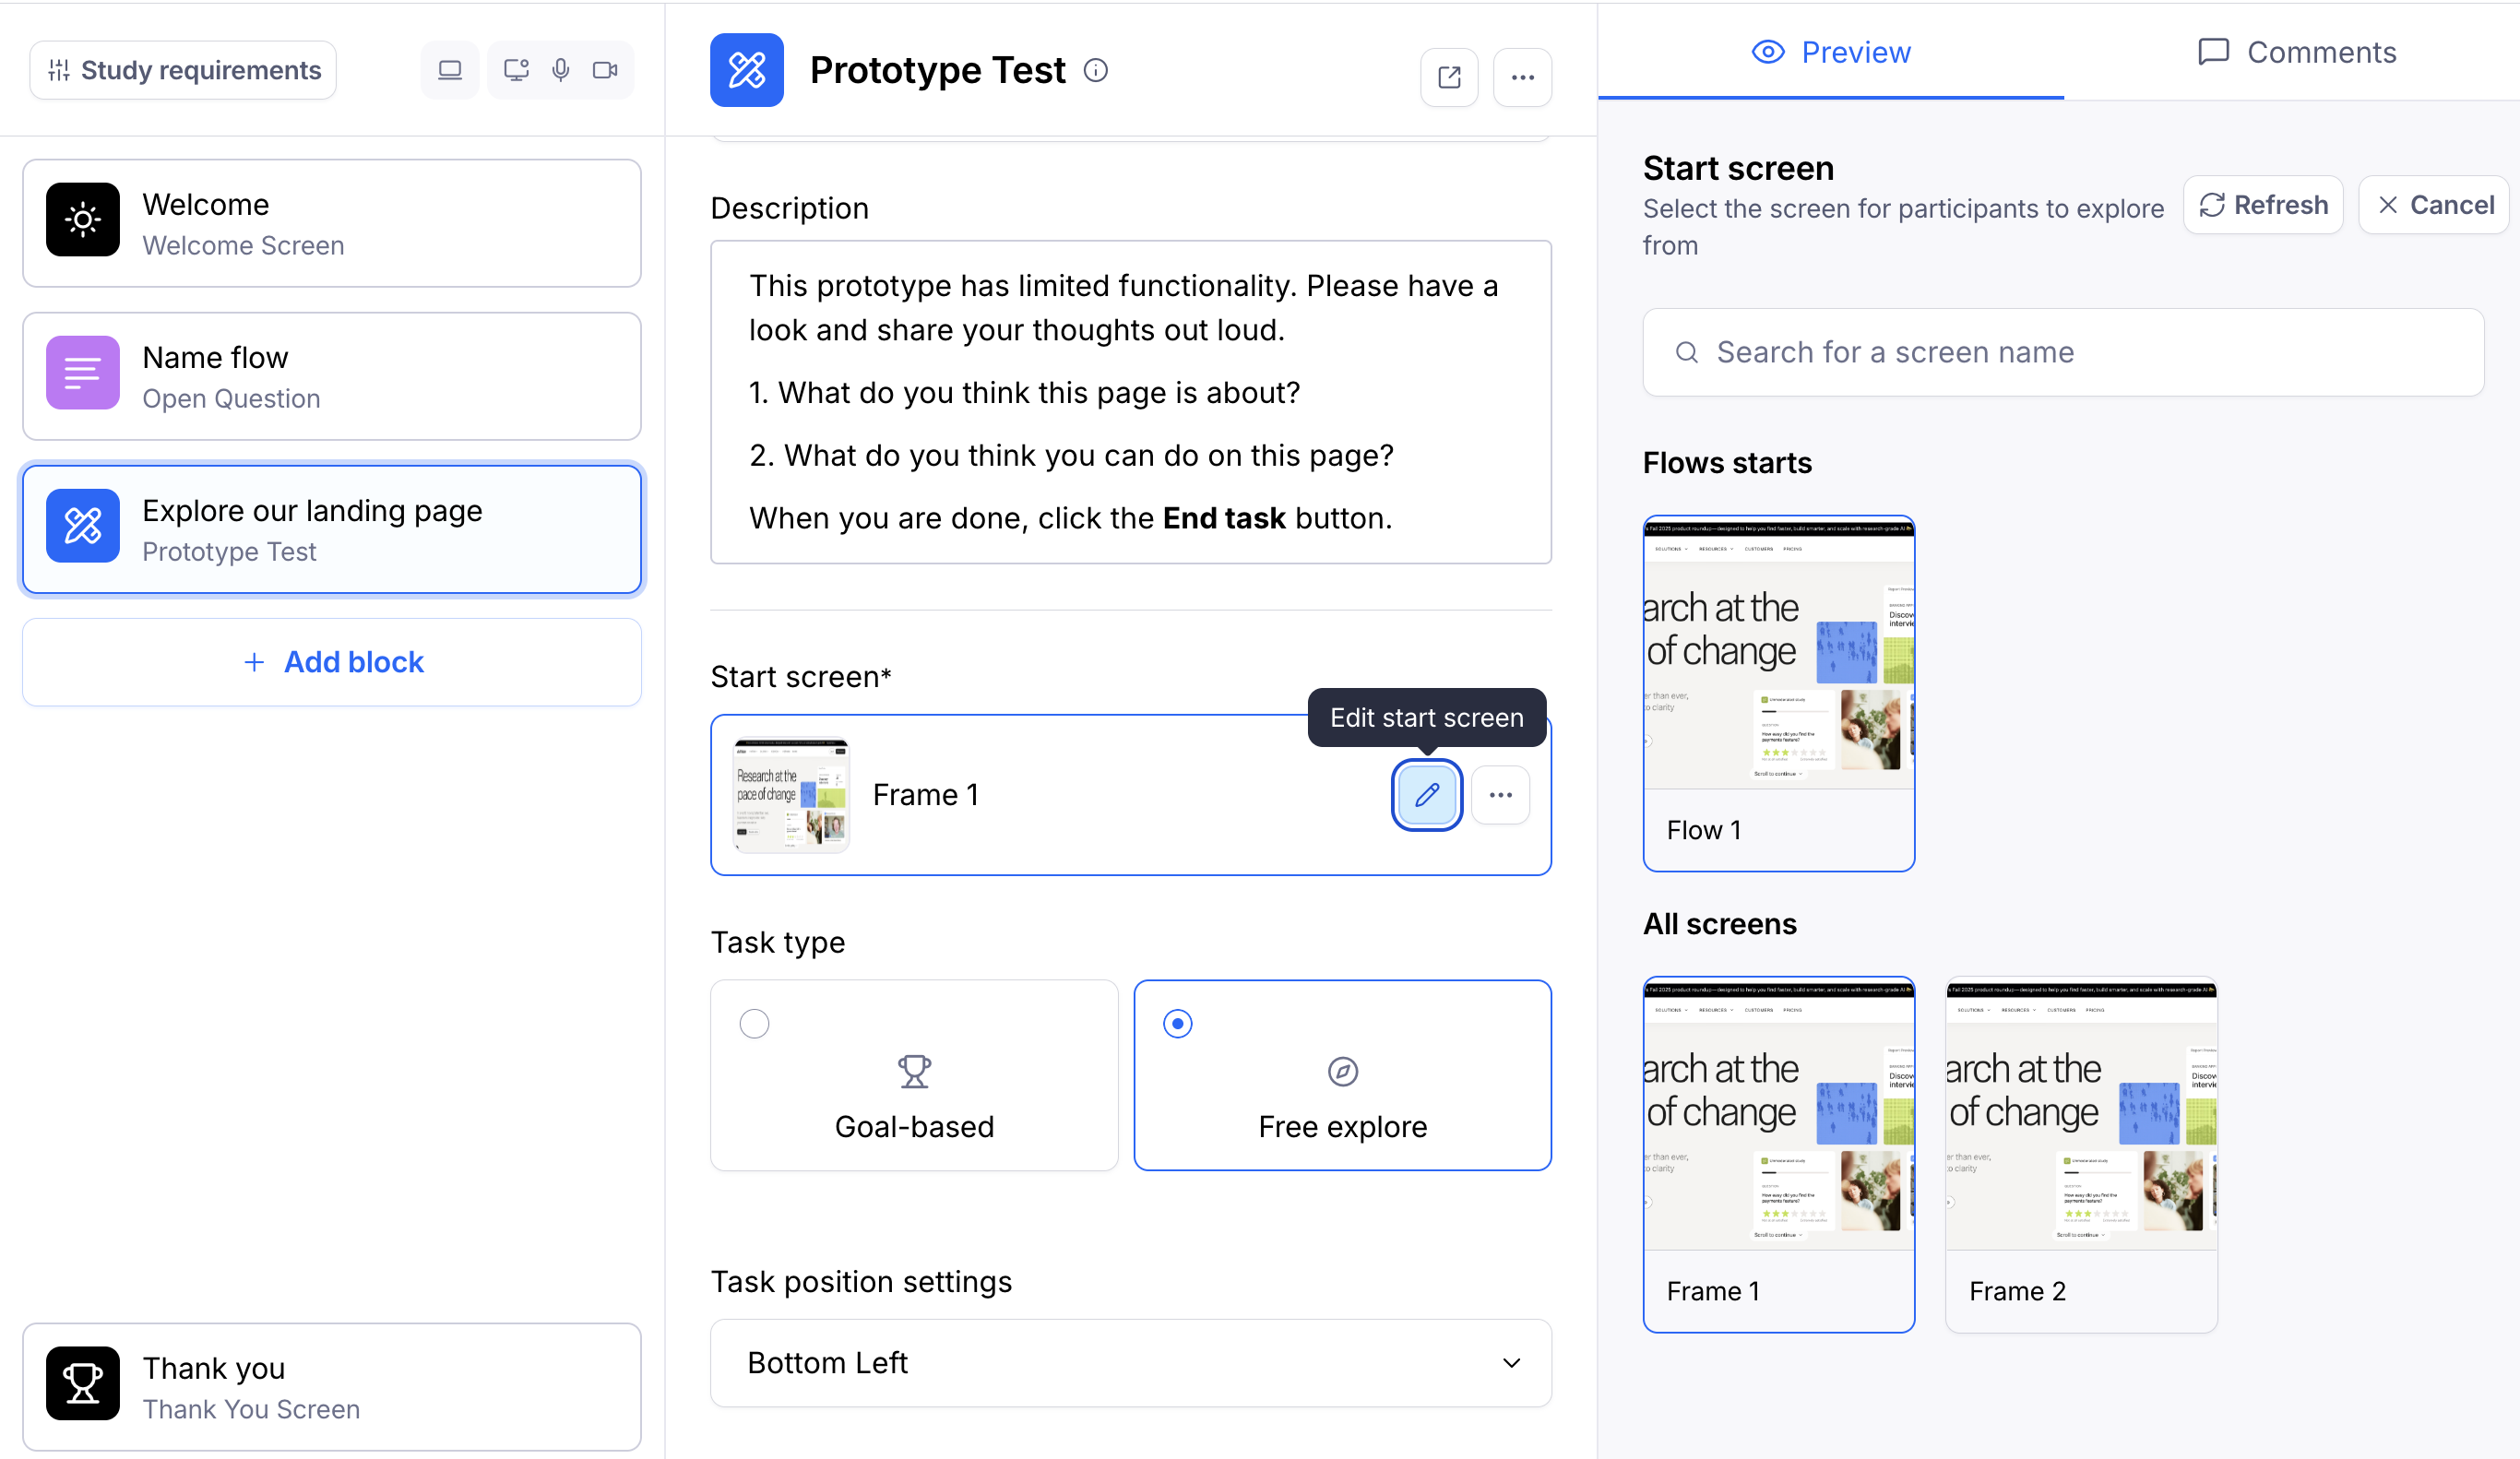
After importing your prototype, you need to select the starting screen (i.e. the screen participants will see at the start of each task) and define the expected path(s).
The start screen is the first screen that your testers will see at the beginning of the mission.
To change the start screen, click the Edit start screen button. This will display all imported screens. Click a screen to select it as the start screen.
Click through the prototype hotspots to add screens to the path.

On prototype tests, you can only click predefined hotspots. If your prototype doesn't have any, go back to the prototyping tool you used and create them. Back in Maze, refresh your prototype. You should now be able to define paths.