Setting up a custom email domain in Reach
Last updated: June 25, 2026
If your team is on the Enterprise plan, you have the option to send Reach campaigns from a custom email domain owned by you, instead of the @mazetesting.com default.
Adding a new custom domain
To add a new email domain:
Log in to your Maze account and ensure the correct team is selected in the drop-down in the upper left corner.
Hover over the Profile icon at the bottom left corner, and click Team Settings.
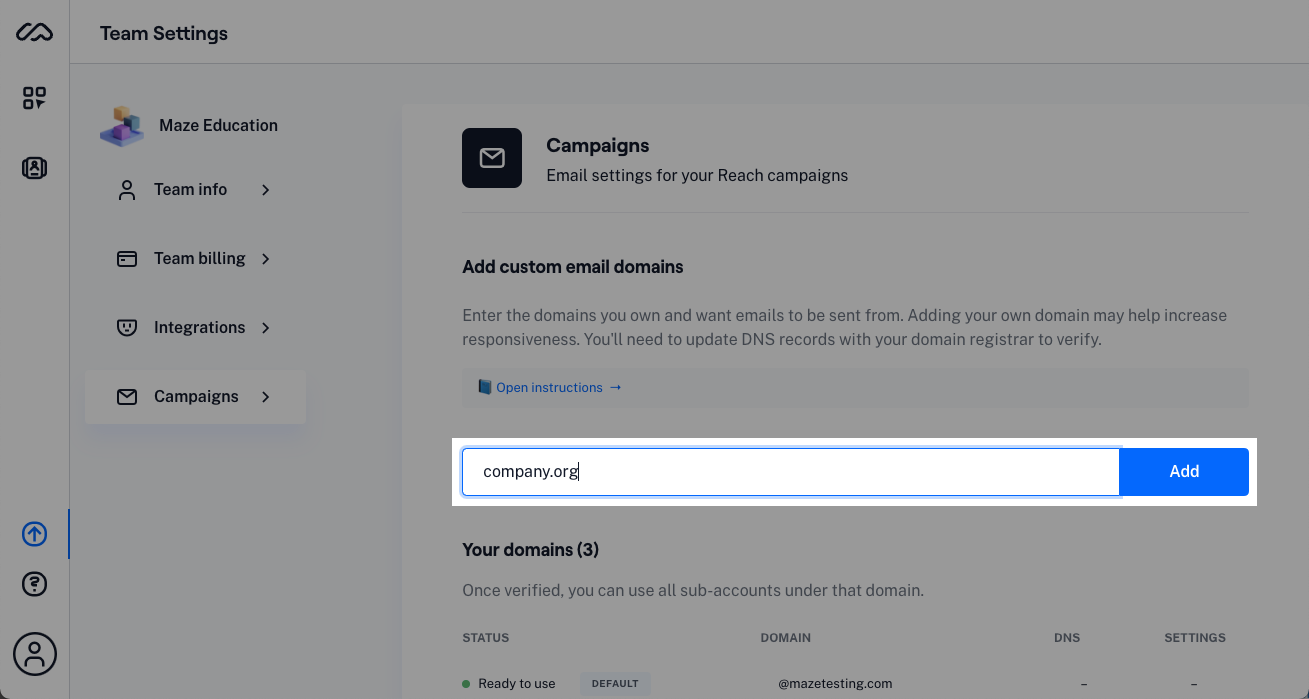
Select the Campaigns tab.
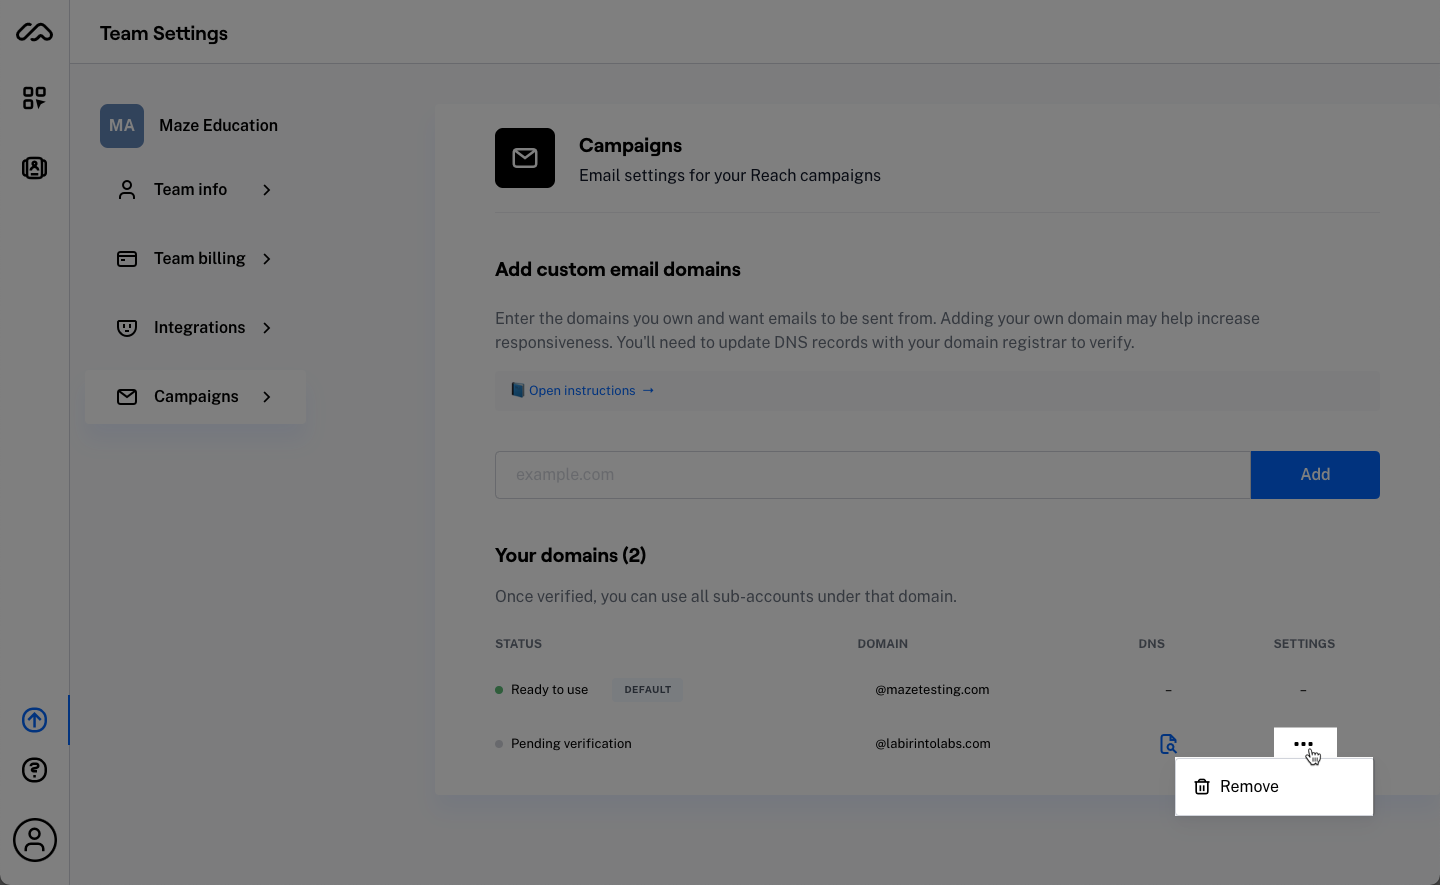
Under 'Add custom email domains', enter your domain in the text field (and only the domain — do not put an @ symbol before the domain), and click the Add button.
Why am I seeing a "[x] is not a valid domain" error? This error is triggered when entering a domain in the wrong format. Check if you've entered an invalid character (e.g.
@), or if the top-level domain is missing (e.g..com)
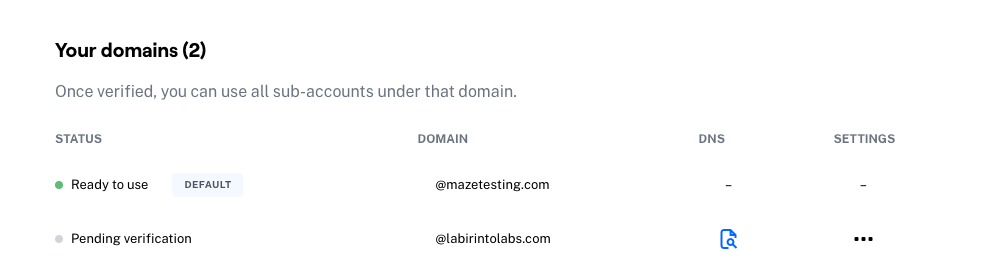
The newly added domain will appear in the 'Your domains' list, with a "Pending verification" status. To verify the newly-added domain, continue to the next section.
Verifying a new custom domain
You need to validate your newly added custom domain to be able to send emails via Reach.
You (or a colleague) must have access to your DNS provider (i.e. the service that hosts your domain name) to complete the domain validation. This process varies slightly depending on your DNS provider.
Please note that you need to repeat these validation steps for each domain that you add.
To verify a custom domain:
Find your newly added domain in the 'Your domains' list, and click the DNS icon next to it,
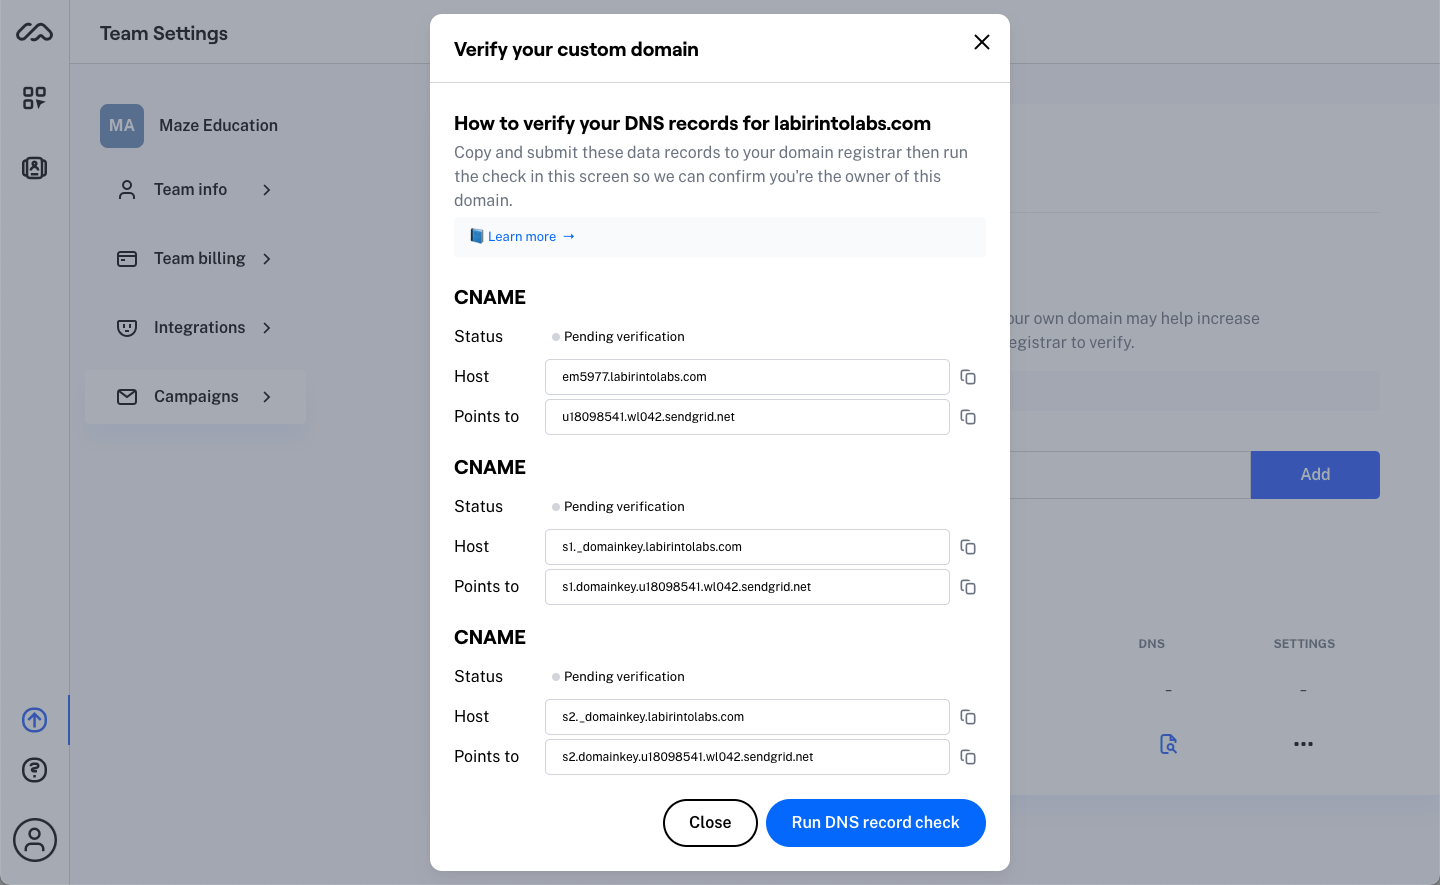
You will see a modal with the DNS records. In a moment, you will need to copy each of these fields and paste them into your DNS provider.
In a separate tab, log in to your DNS provider.
Access your DNS management settings and add a new record.
In the record type, select CNAME.
Copy the Host and Points to fields from Maze, and paste them in the new record form of your DNS provider.
Confirm, and repeat steps 4 to 6 to add the two remaining records.
Save your changes on your DNS provider's side.
Back in Maze, click Run DNS record check.
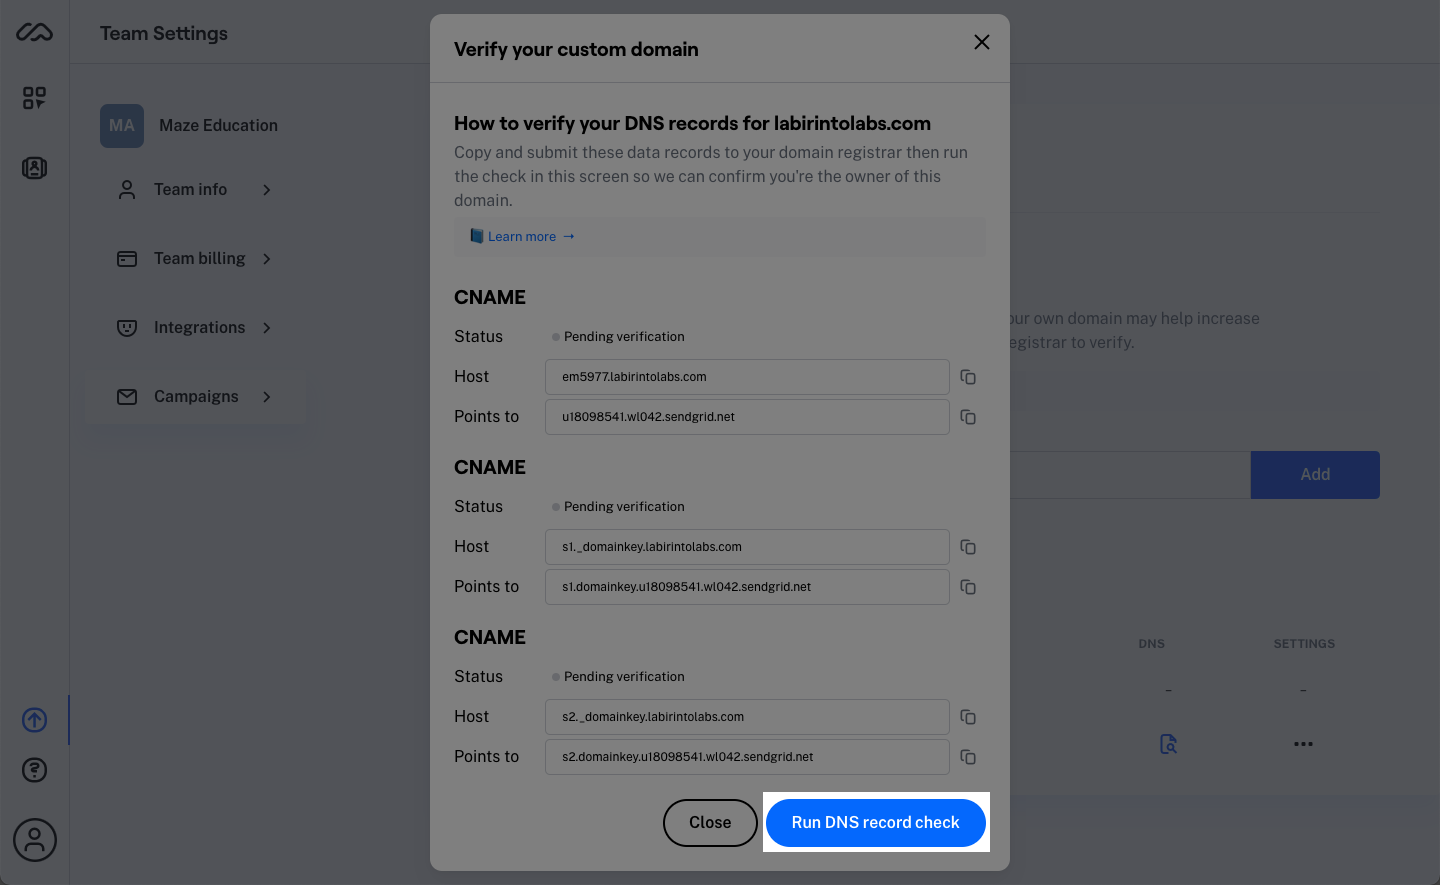
We will attempt to communicate with your DNS provider. If the verification is successful, the status will change to "Verified".
Sending out Reach campaigns using your custom domain
Once the domain is verified, you can use that domain when sending out Reach campaigns. Learn more in this article: Managing campaigns in Reach
Troubleshooting a failed verification
If the state changes to "Verification failed" instead of "Verified", that means that the communication with your DNS provider wasn't successful. As such, we couldn't verify that you own that domain.
In this case, please compare the records between Maze and your DNS provider, and ensure that you've copied all records correctly.
If the issue persists, please reach out to our Support team for additional guidance.
Removing a custom domain
If you made a typo when entering your custom domain, or no longer want to use it to send Reach campaigns, you can delete it.
Open the Campaigns tab in your Team settings.
Scroll to the 'Your Domains' section.
Next to the domain you wish to remove, click the Settings icon (•••).
Select Remove from the drop-down.
Confirm by clicking the Remove button.
Please note that it isn't possible to remove the @mazetesting.com default domain.
Still need help?
If you have any questions or concerns, please let our Support team know — we'll be happy to help!