Variant comparison with Maze
Last updated: April 19, 2026
Design comparison enables testing various versions of your product to determine which one offers the best usability and appeal.
The aim of this type of testing is to understand how various variables influence overall performance, so it's important to establish the metric(s) to be measured before beginning. For example, you could improve a call-to-action's (CTA) click rate by testing two variations of the CTA button.
You can test different variants using Maze, utilizing any block type. This article explores two different approaches you can take: using a single study or two separate ones.
In this article:
- Different approaches
- Using the variant comparison block
- Alternate solutions for variant comparison testing
- FAQ
- Additional resources
Different approaches to variant comparison
There are different strategies you can use when defining which aspects to compare:
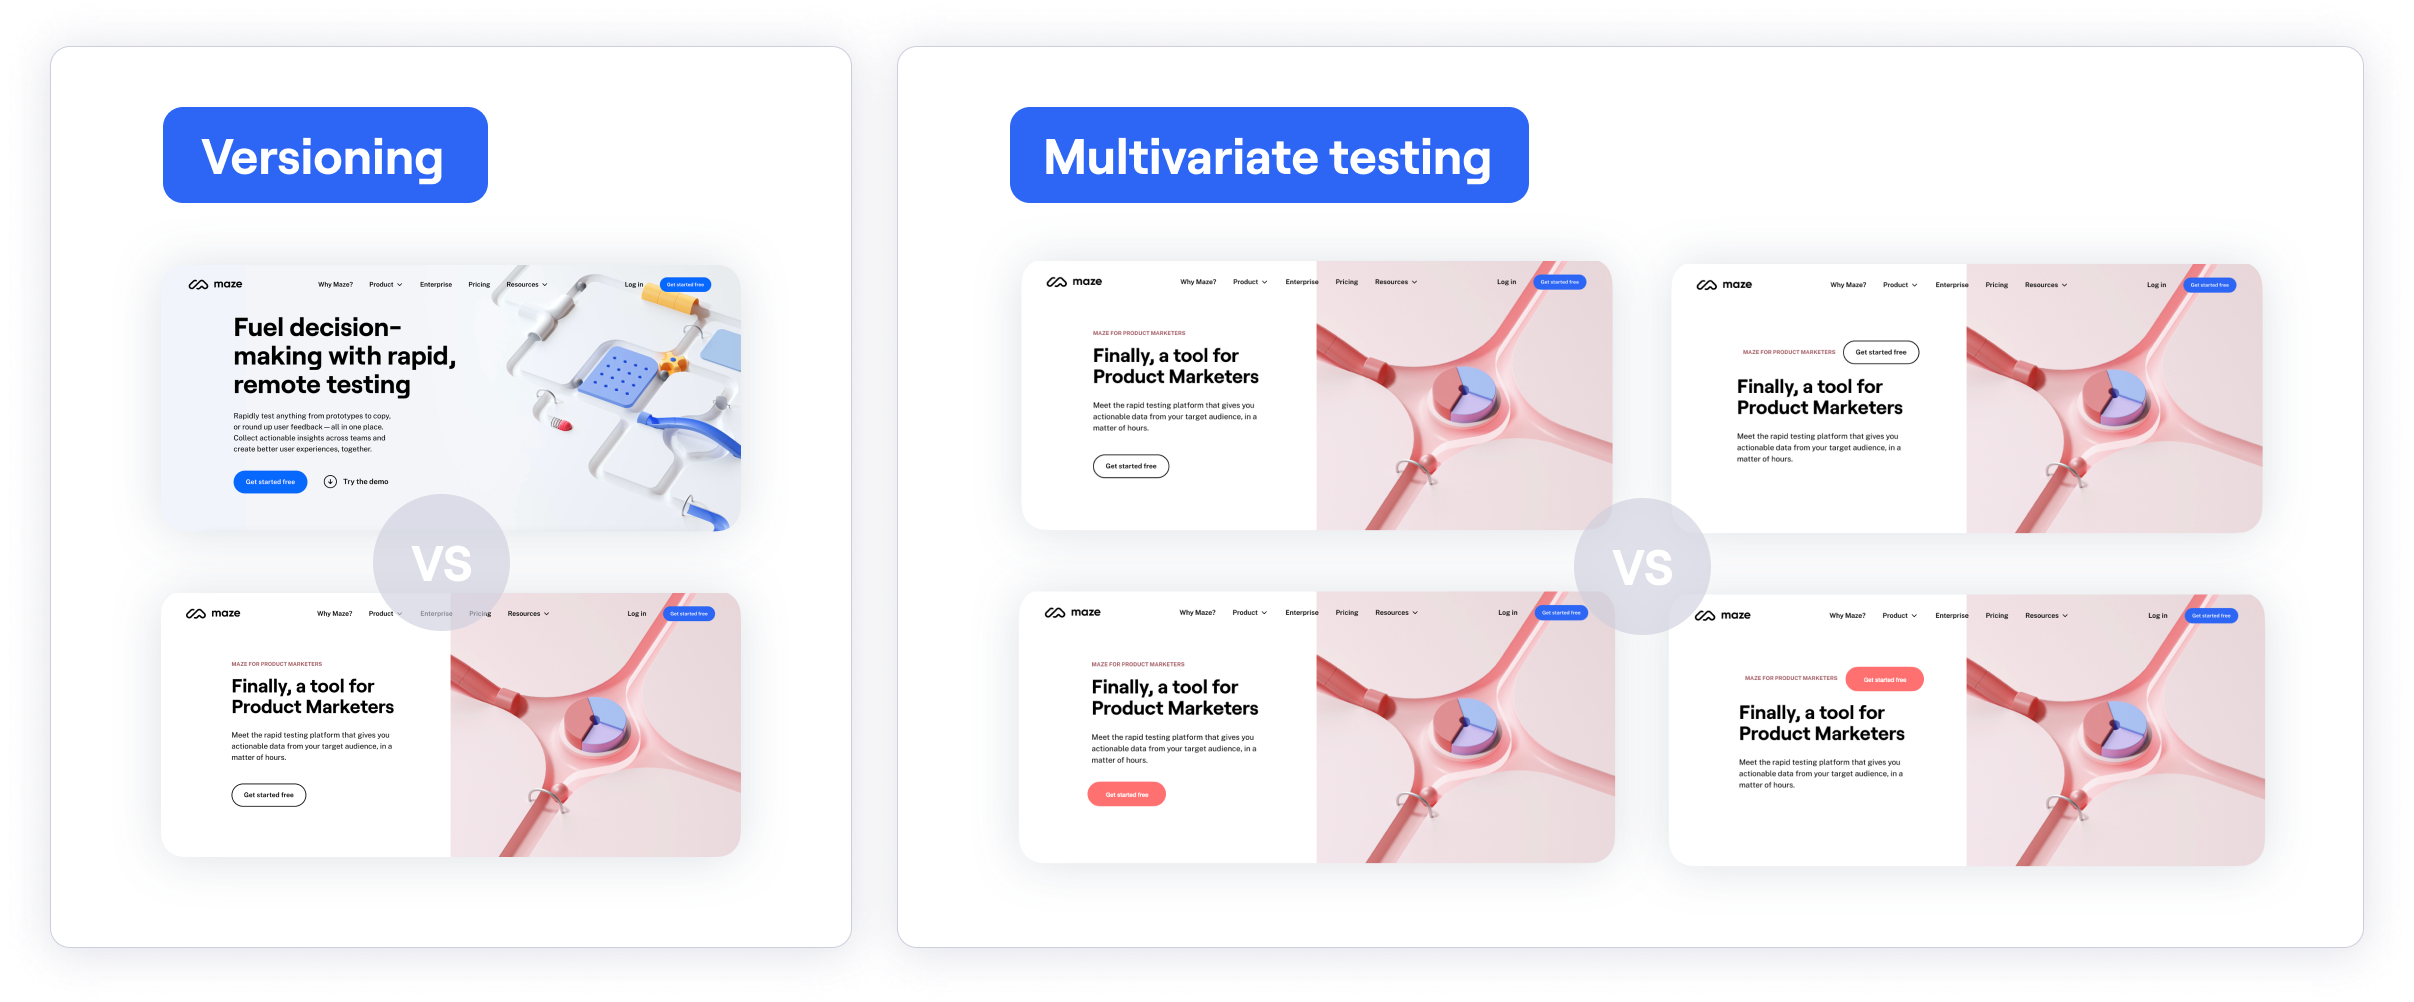
- Versioning: When testing completely different versions of a design. For example, to validate which user flow seems more intuitive to users.
- Multivariate: When testing variations within a design. For example, to validate which color or CTA copy resonates the most.
Different approaches to participant distribution
There are also different approaches to allocating users, or exposing them to different treatments:
-
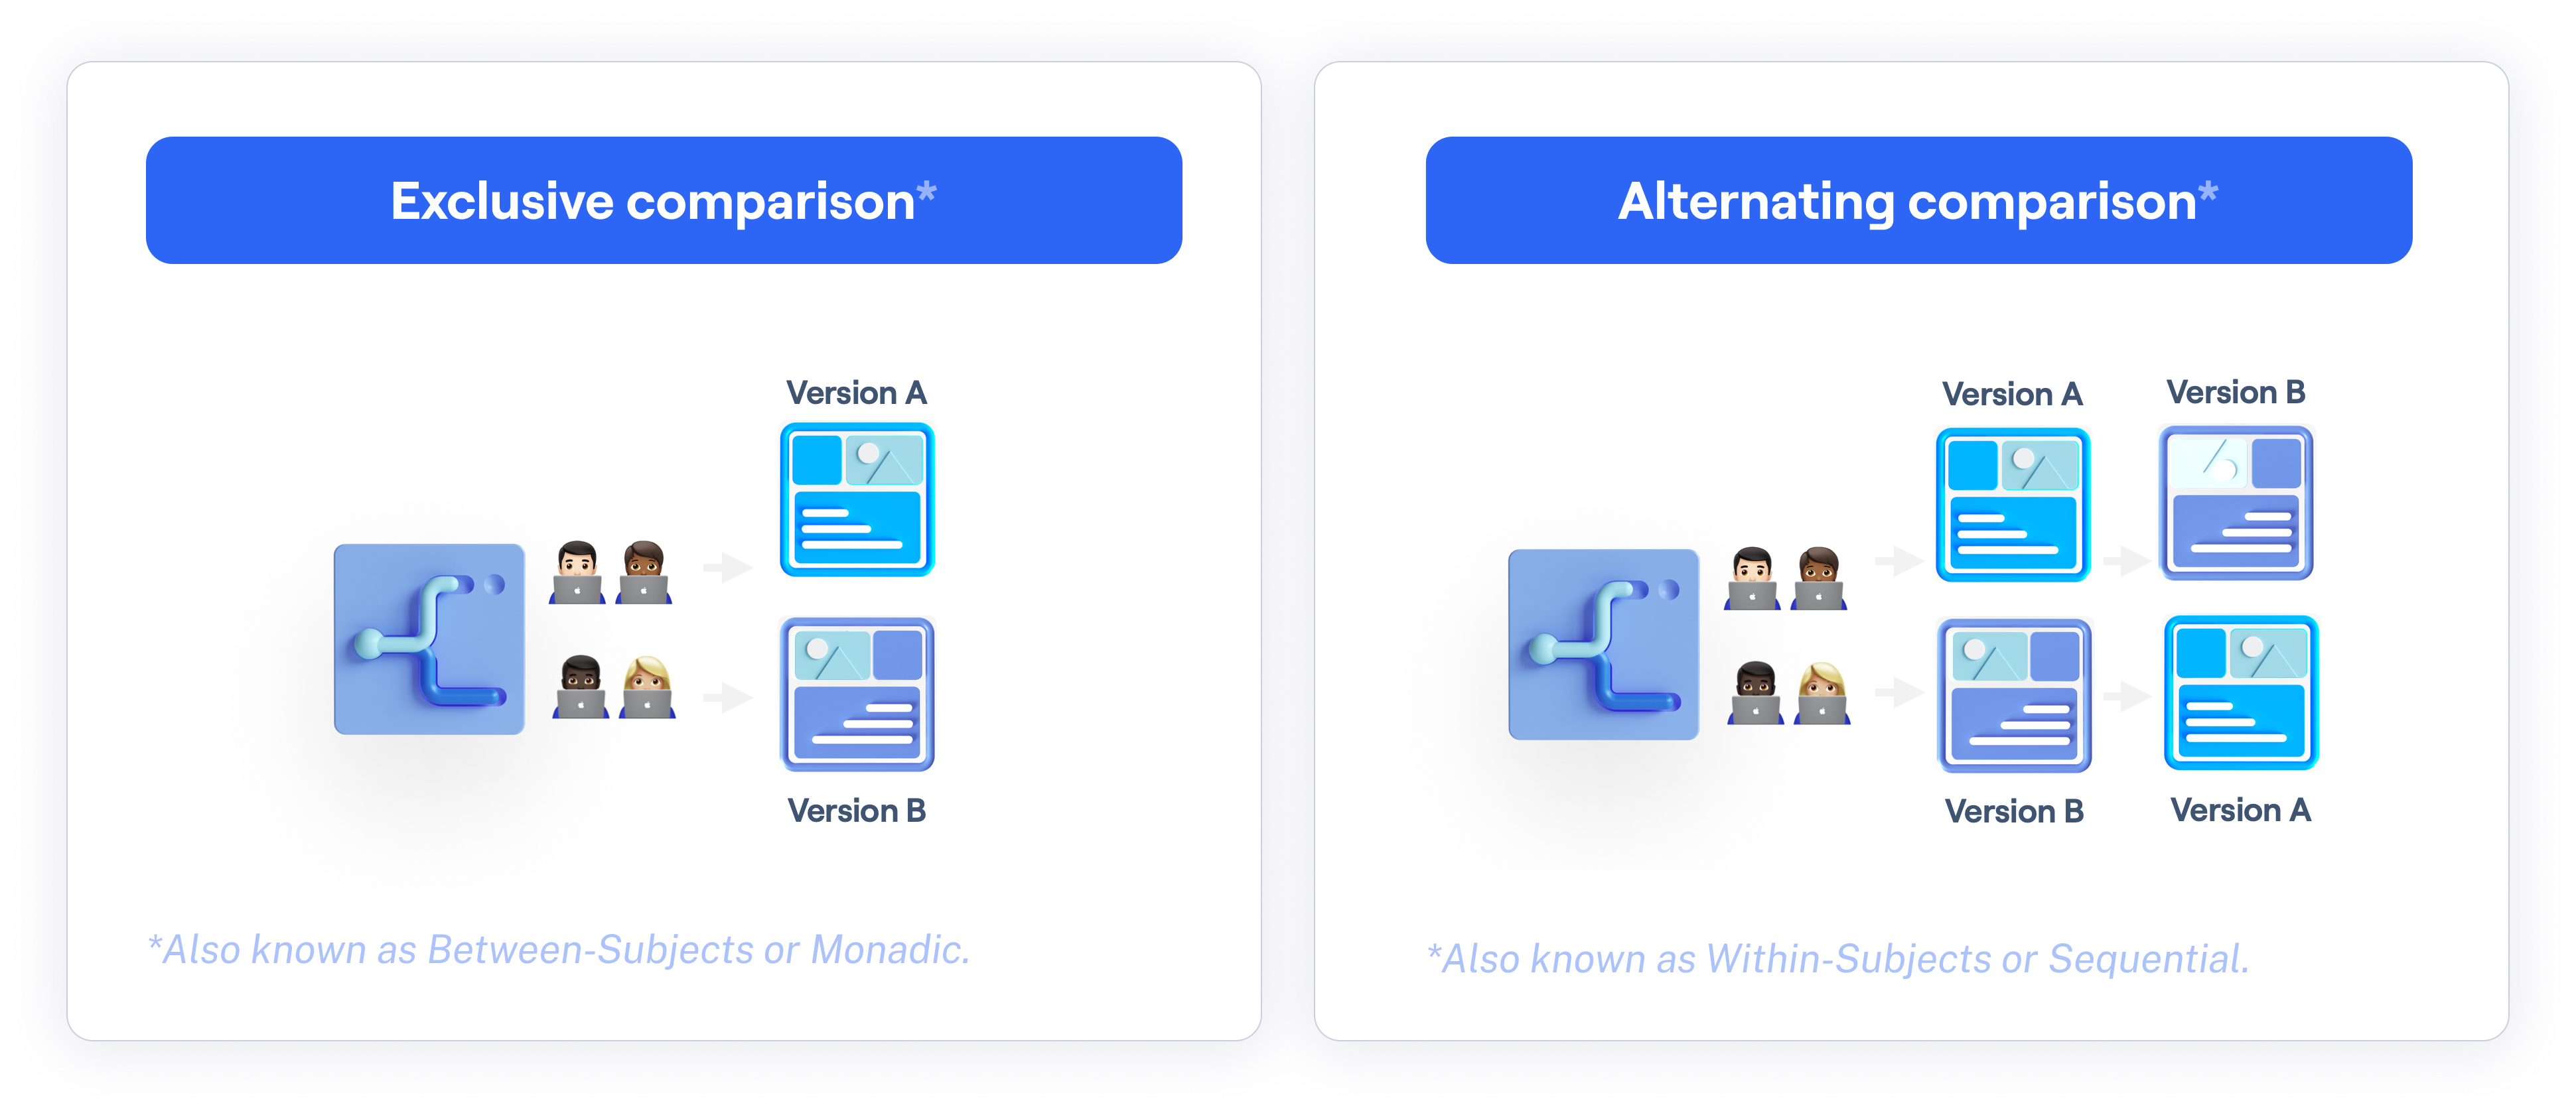
Exclusive comparison: Each tester is assigned to only one version of the design. In product research, the terms Monadic, Between-subjects, and Between-groups can also be used to describe this approach.
While a perfectly even split can't be guaranteed, Maze assigns participants to a variant when they reach the variant comparison block to help achieve a more balanced distribution.
- Alternating comparison: All testers are exposed to both versions, although in a different order. The terms Sequential, Within-subjects, Within-groups, and Consecutive are also used to describe this approach.
Using the variant comparison block
The variant comparison block allows you to test and compare multiple design variants. This helps identify the best-performing designs in terms of usability and desirability.
| ✅ Advantages | ❌ Limitations |
|---|---|
| Keep everything in a single study | Only one design file can be linked per study, so both versions must live in the same file. |
| Recruit testers from the Maze panel | Both versions must be ready before publishing, since it's not possible to add prototypes to a live study. |
| All results in one place — just compare the differences between blocks |
Who can use this feature
The variant comparison block is an Enterprise plan feature.
To reduce bias, you can choose to display these versions sequentially (consecutive comparison) or one at a time (exclusive comparison).
Step 1: Add a variant comparison block
Open your draft study, or create a new one.
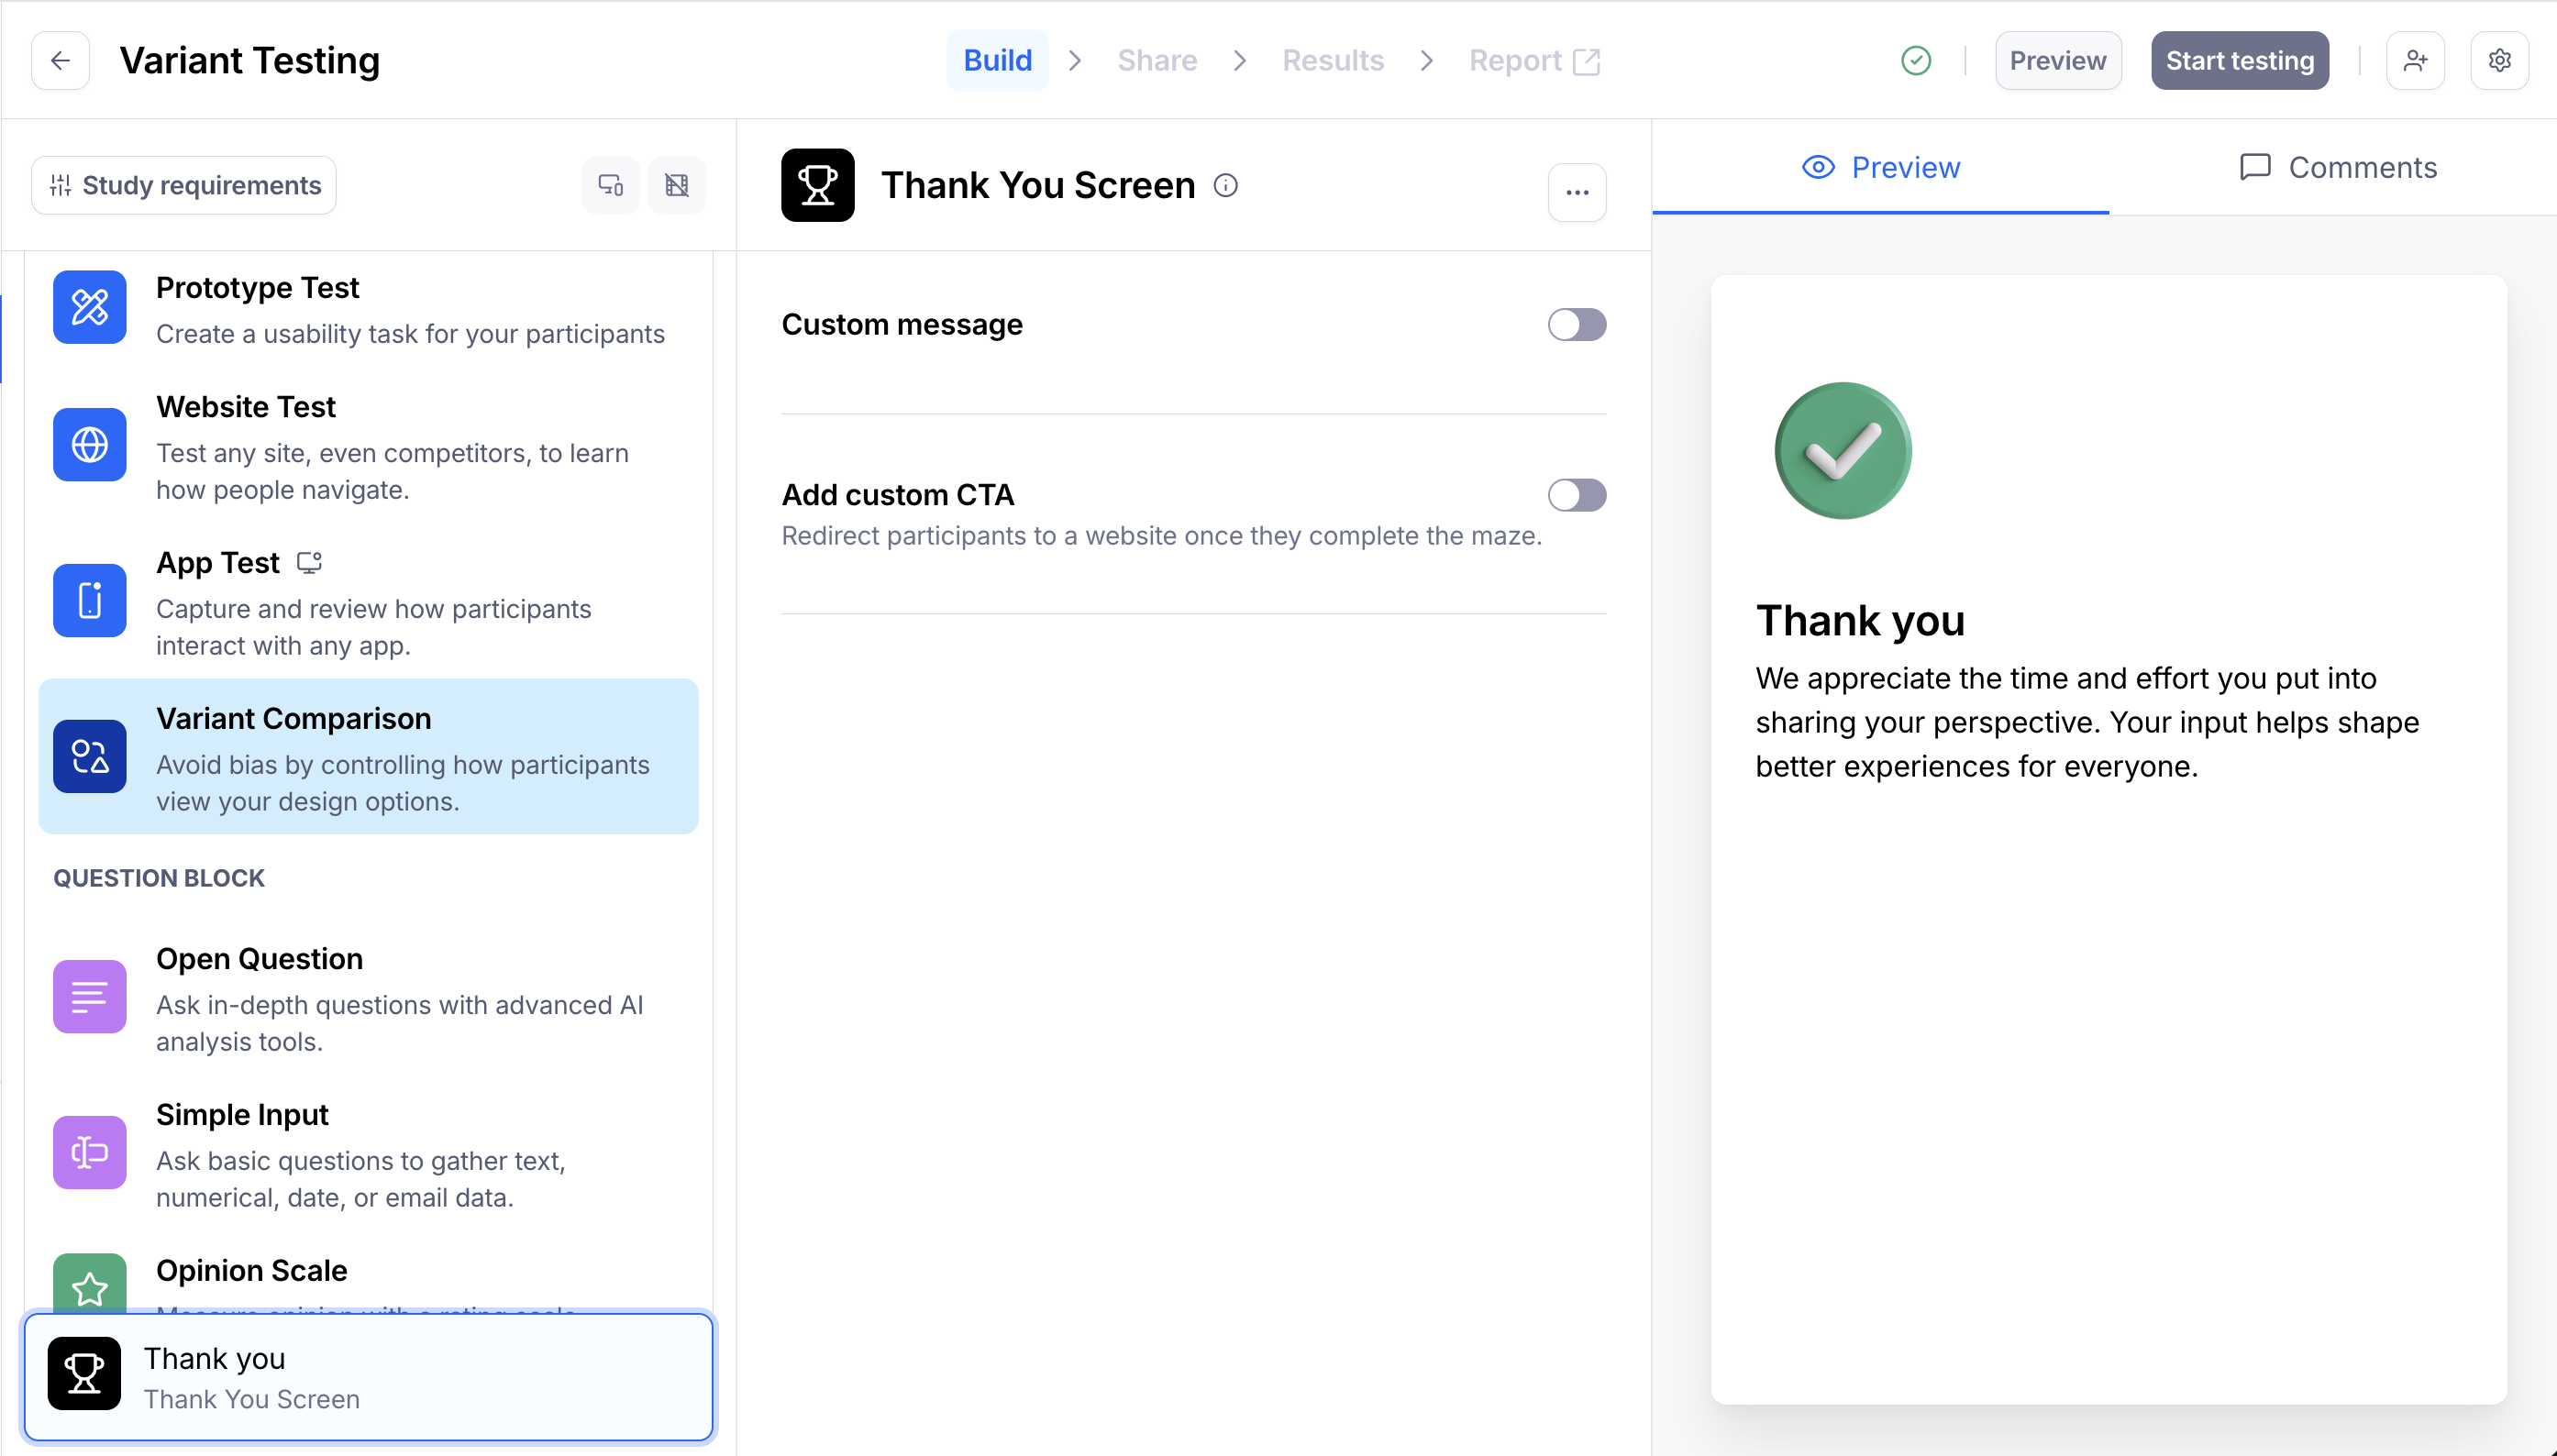
In the blocks list, click Add block, then select the Variant Comparison block from the drop-down.
Multiple variant comparison blocks can be added to a single study.
Step 2: Define your approach
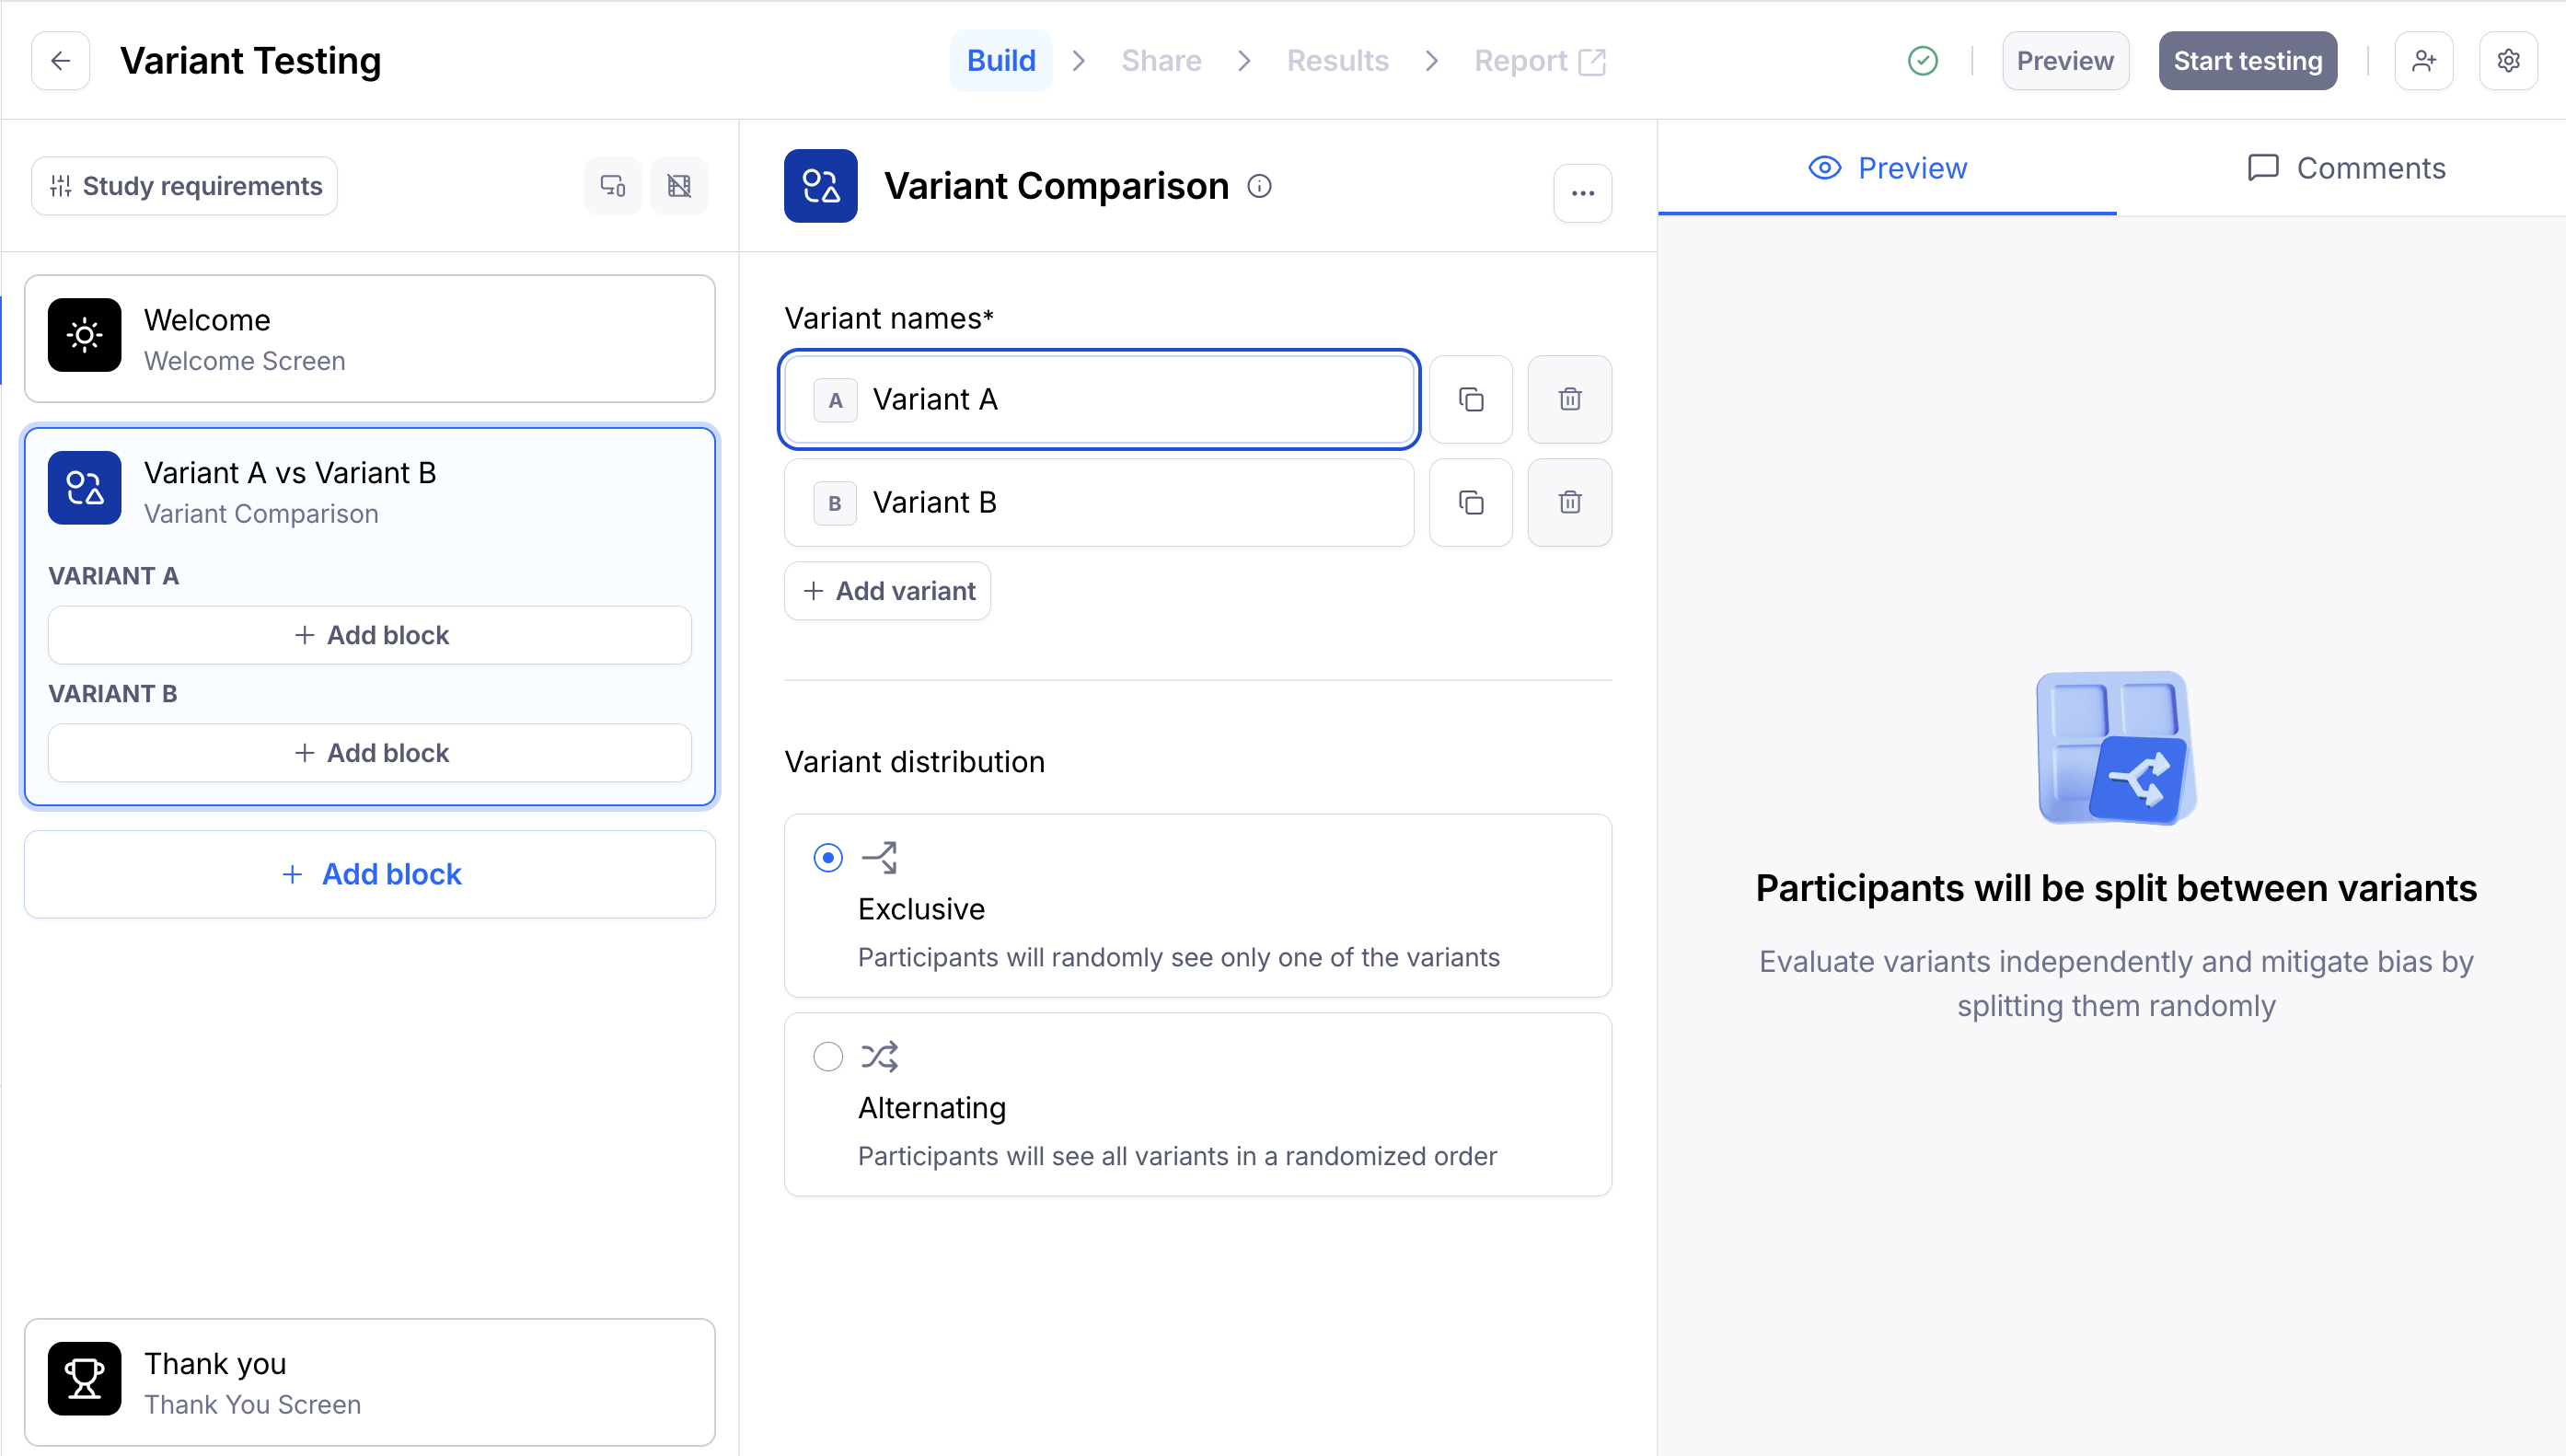
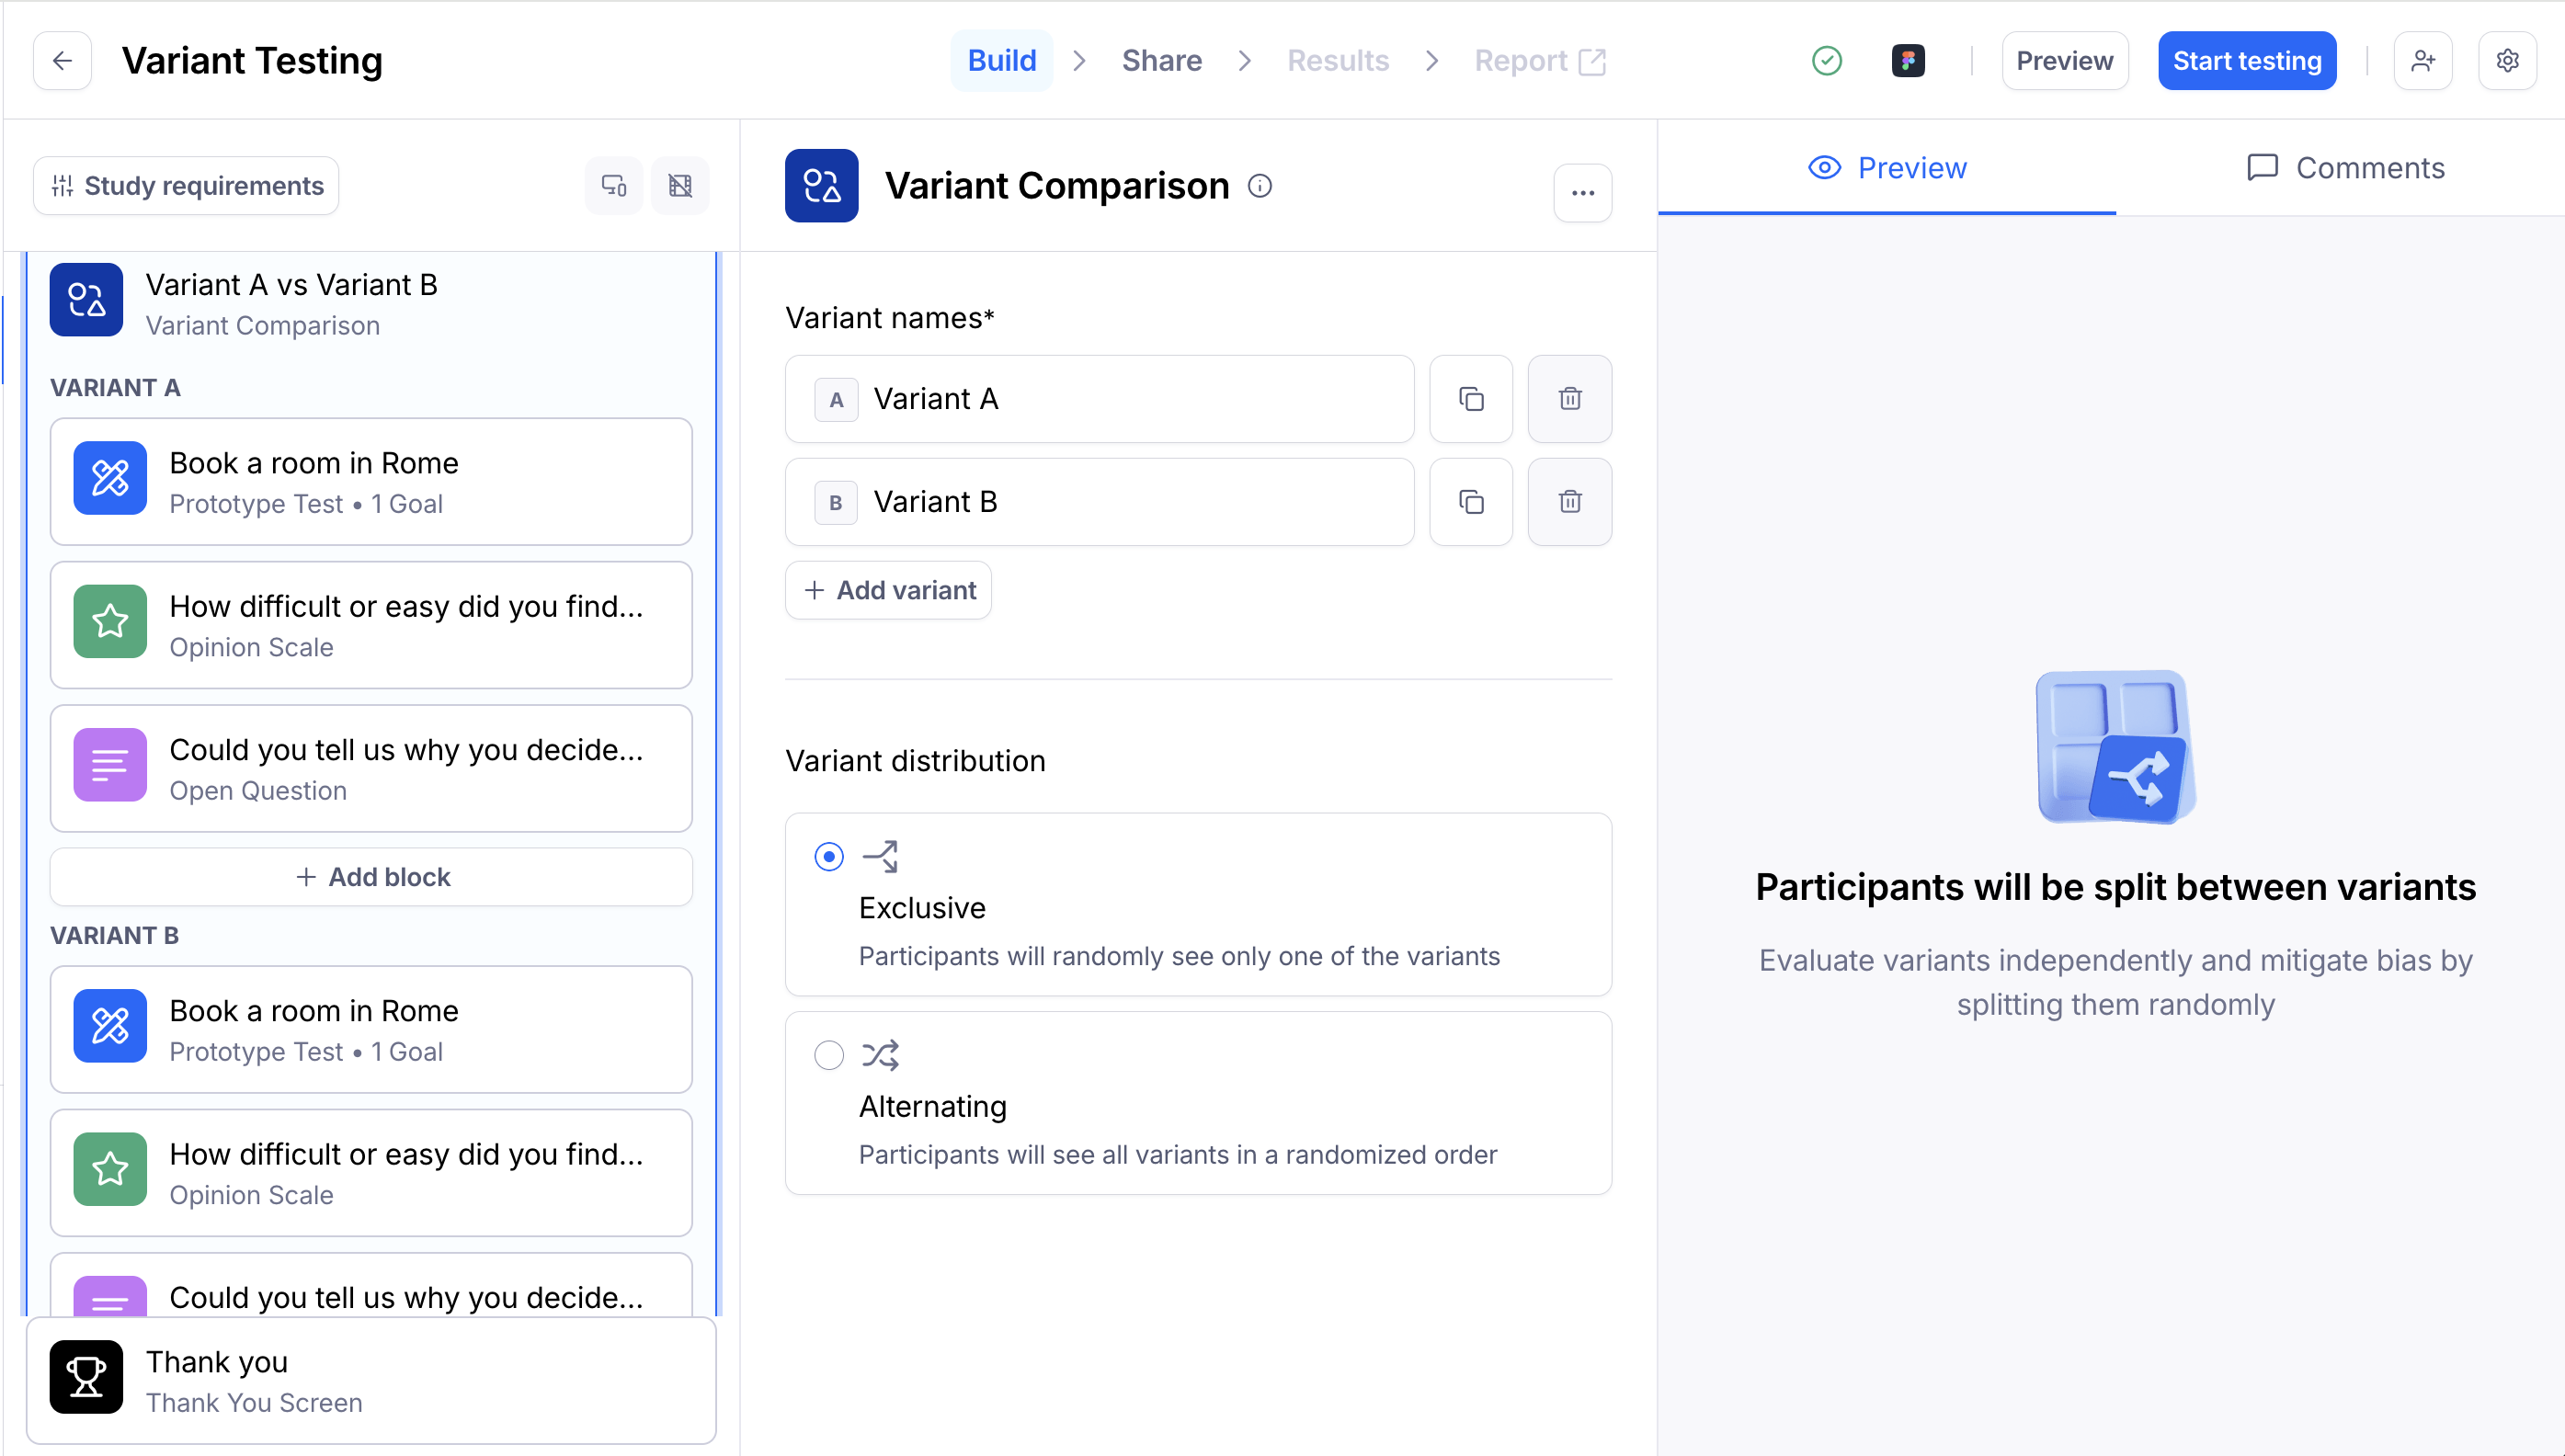
Give each variant a name to make it easier to tell them apart in results (e.g., "CTA Blue" and "CTA Red"). These names won't be visible to participants.
Click + Add variant to add more variants — you can add up to 5.
Pick a variant distribution method:
- Exclusive: Participants are randomly split between variants and see only one of them.
- Alternating: Participants see all variants in a randomized order.
Step 3: Add blocks for each of the variants
Next, add blocks for each variant.
You can add any block type, except screeners or other variant comparisons. For example, you could add a prototype or website test, an opinion scale, or an open question with dynamic follow-ups.
After setting up the first variant in a Variant Comparison block, use the Duplicate button. This will create a copy of that variant and duplicate all blocks within it.
Please note that only one prototype can be imported per study. After importing, the prototype will be linked to all prototype blocks across the study. This means that the imported file must include all the flows you want to test.
Change the start screen to select a different flow within the design file. Learn how to test multiple flows using a single Figma prototype
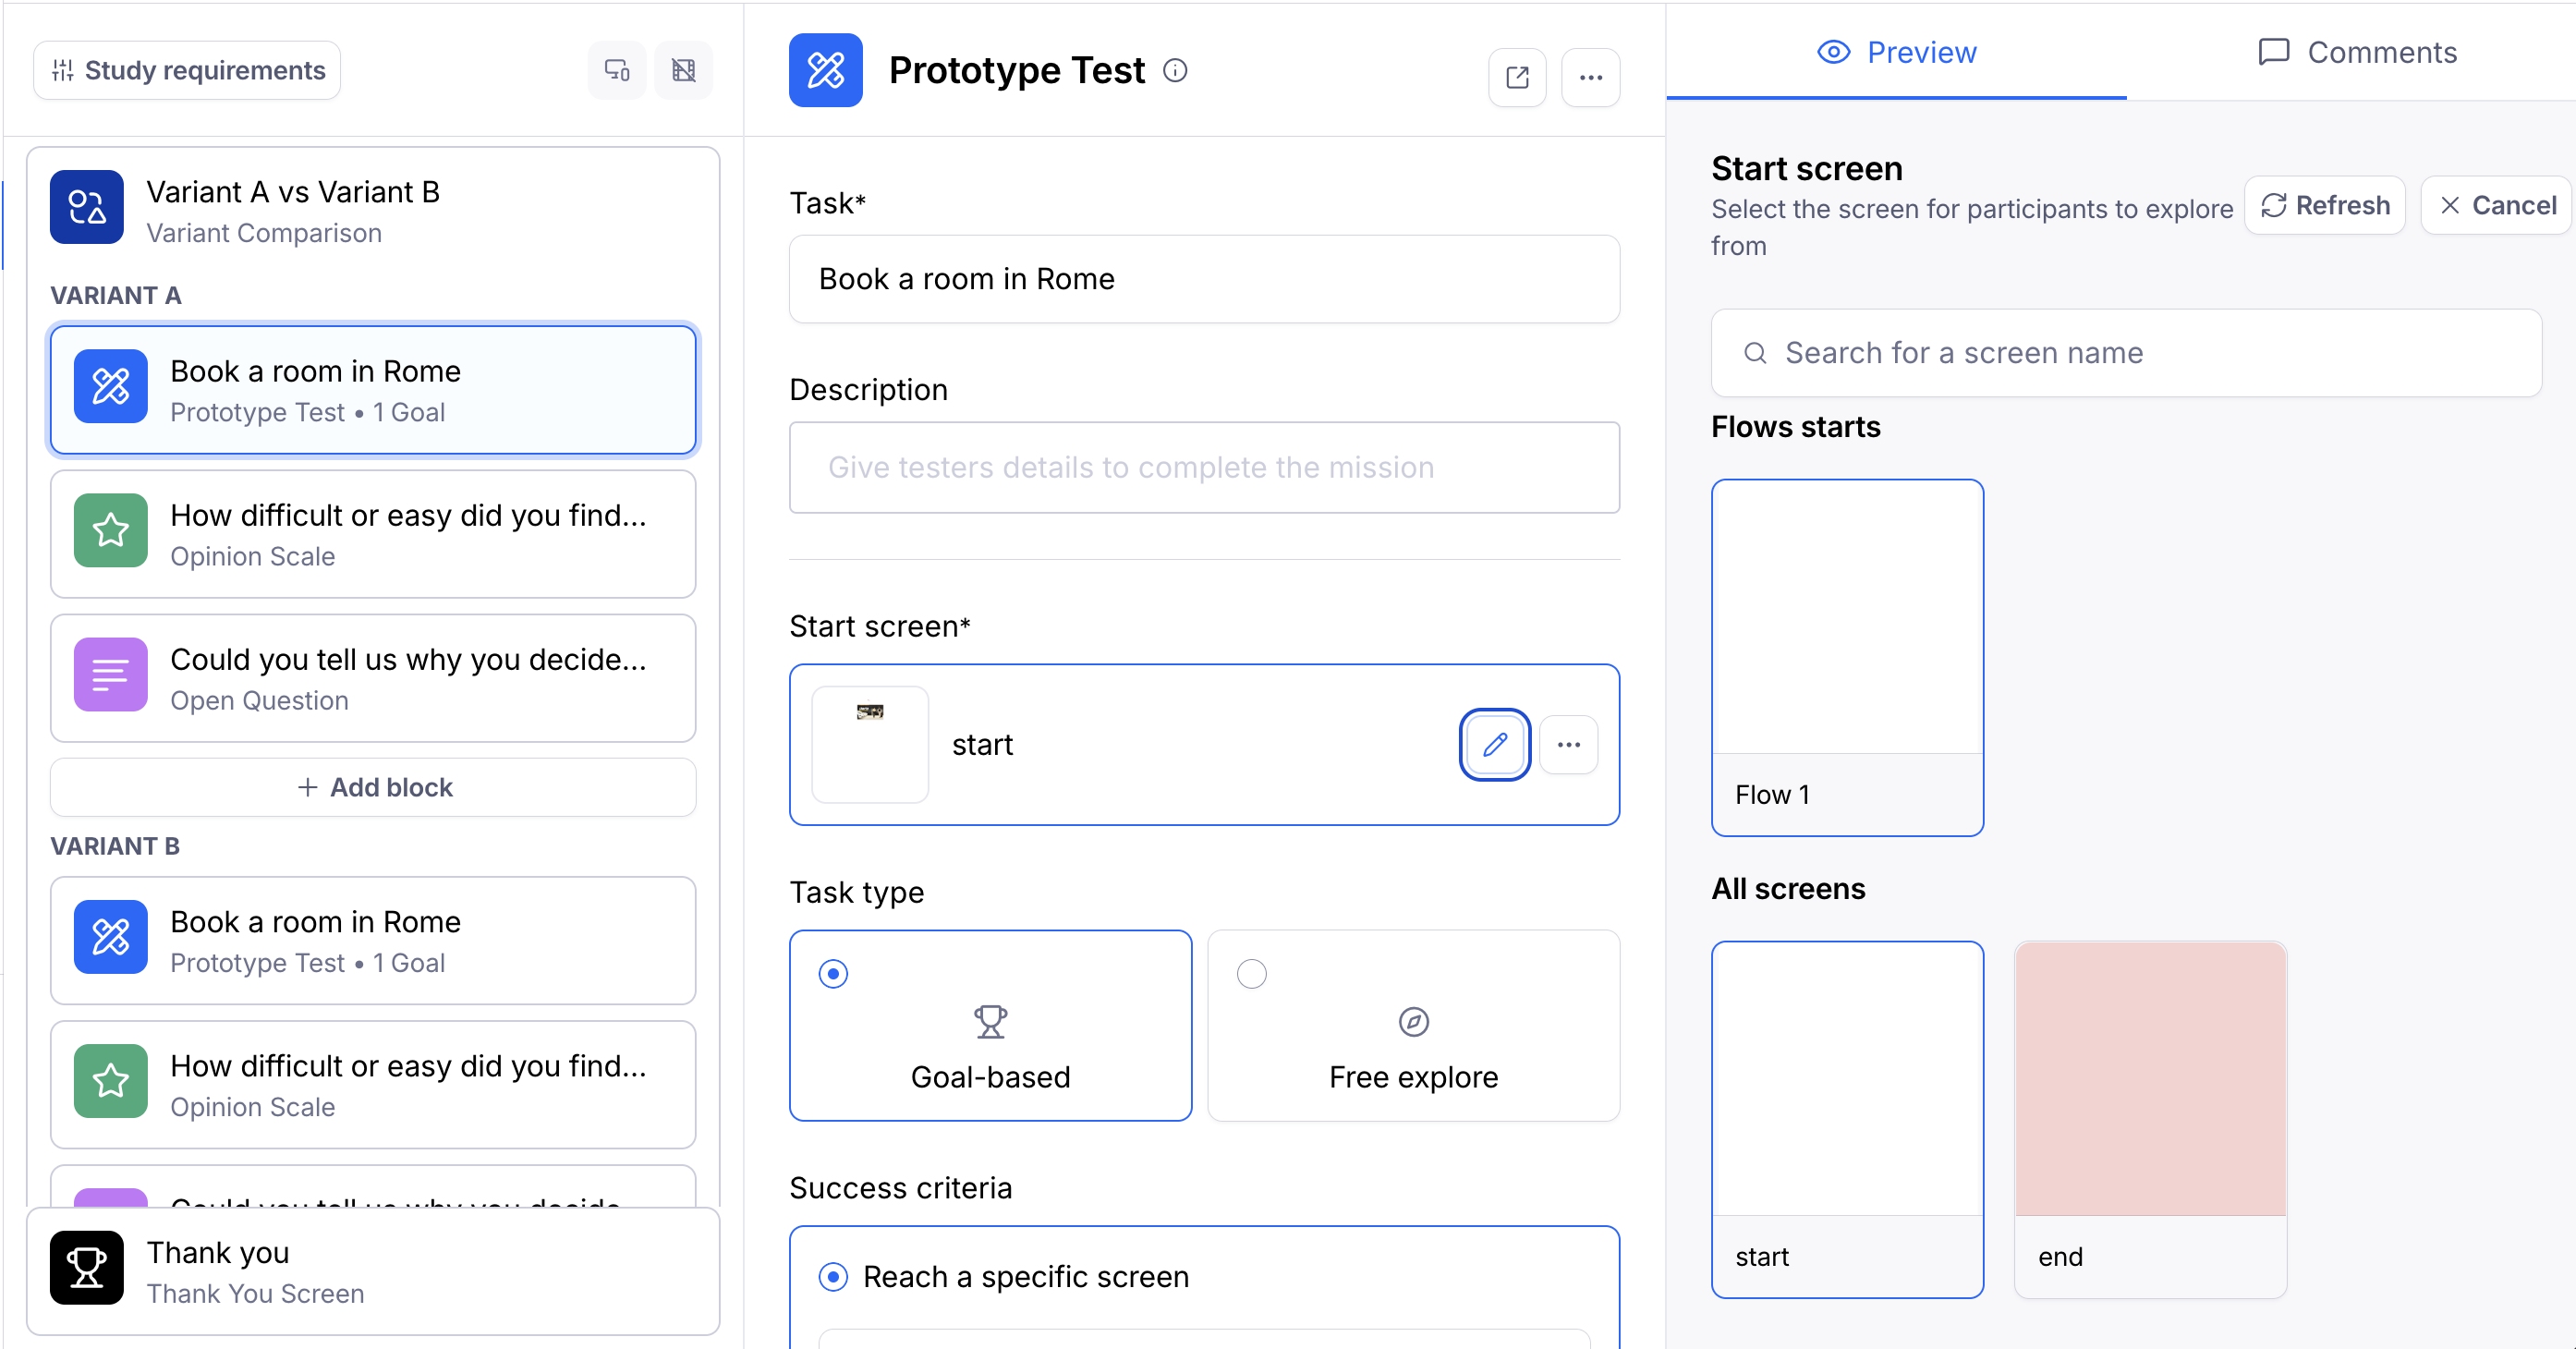
Optionally, you can add conditional logic to route participants to different blocks within a variant based on their actions and responses during the study.
Step 4: Preview, publish, and share
Before publishing your study, preview and test it thoroughly until you are satisfied with the content and performance.
After previewing and publishing, share the study link with the participants. Learn more about sharing studies
The variant distribution will be handled in the background according to the method you've selected.
Step 5: Analyze results
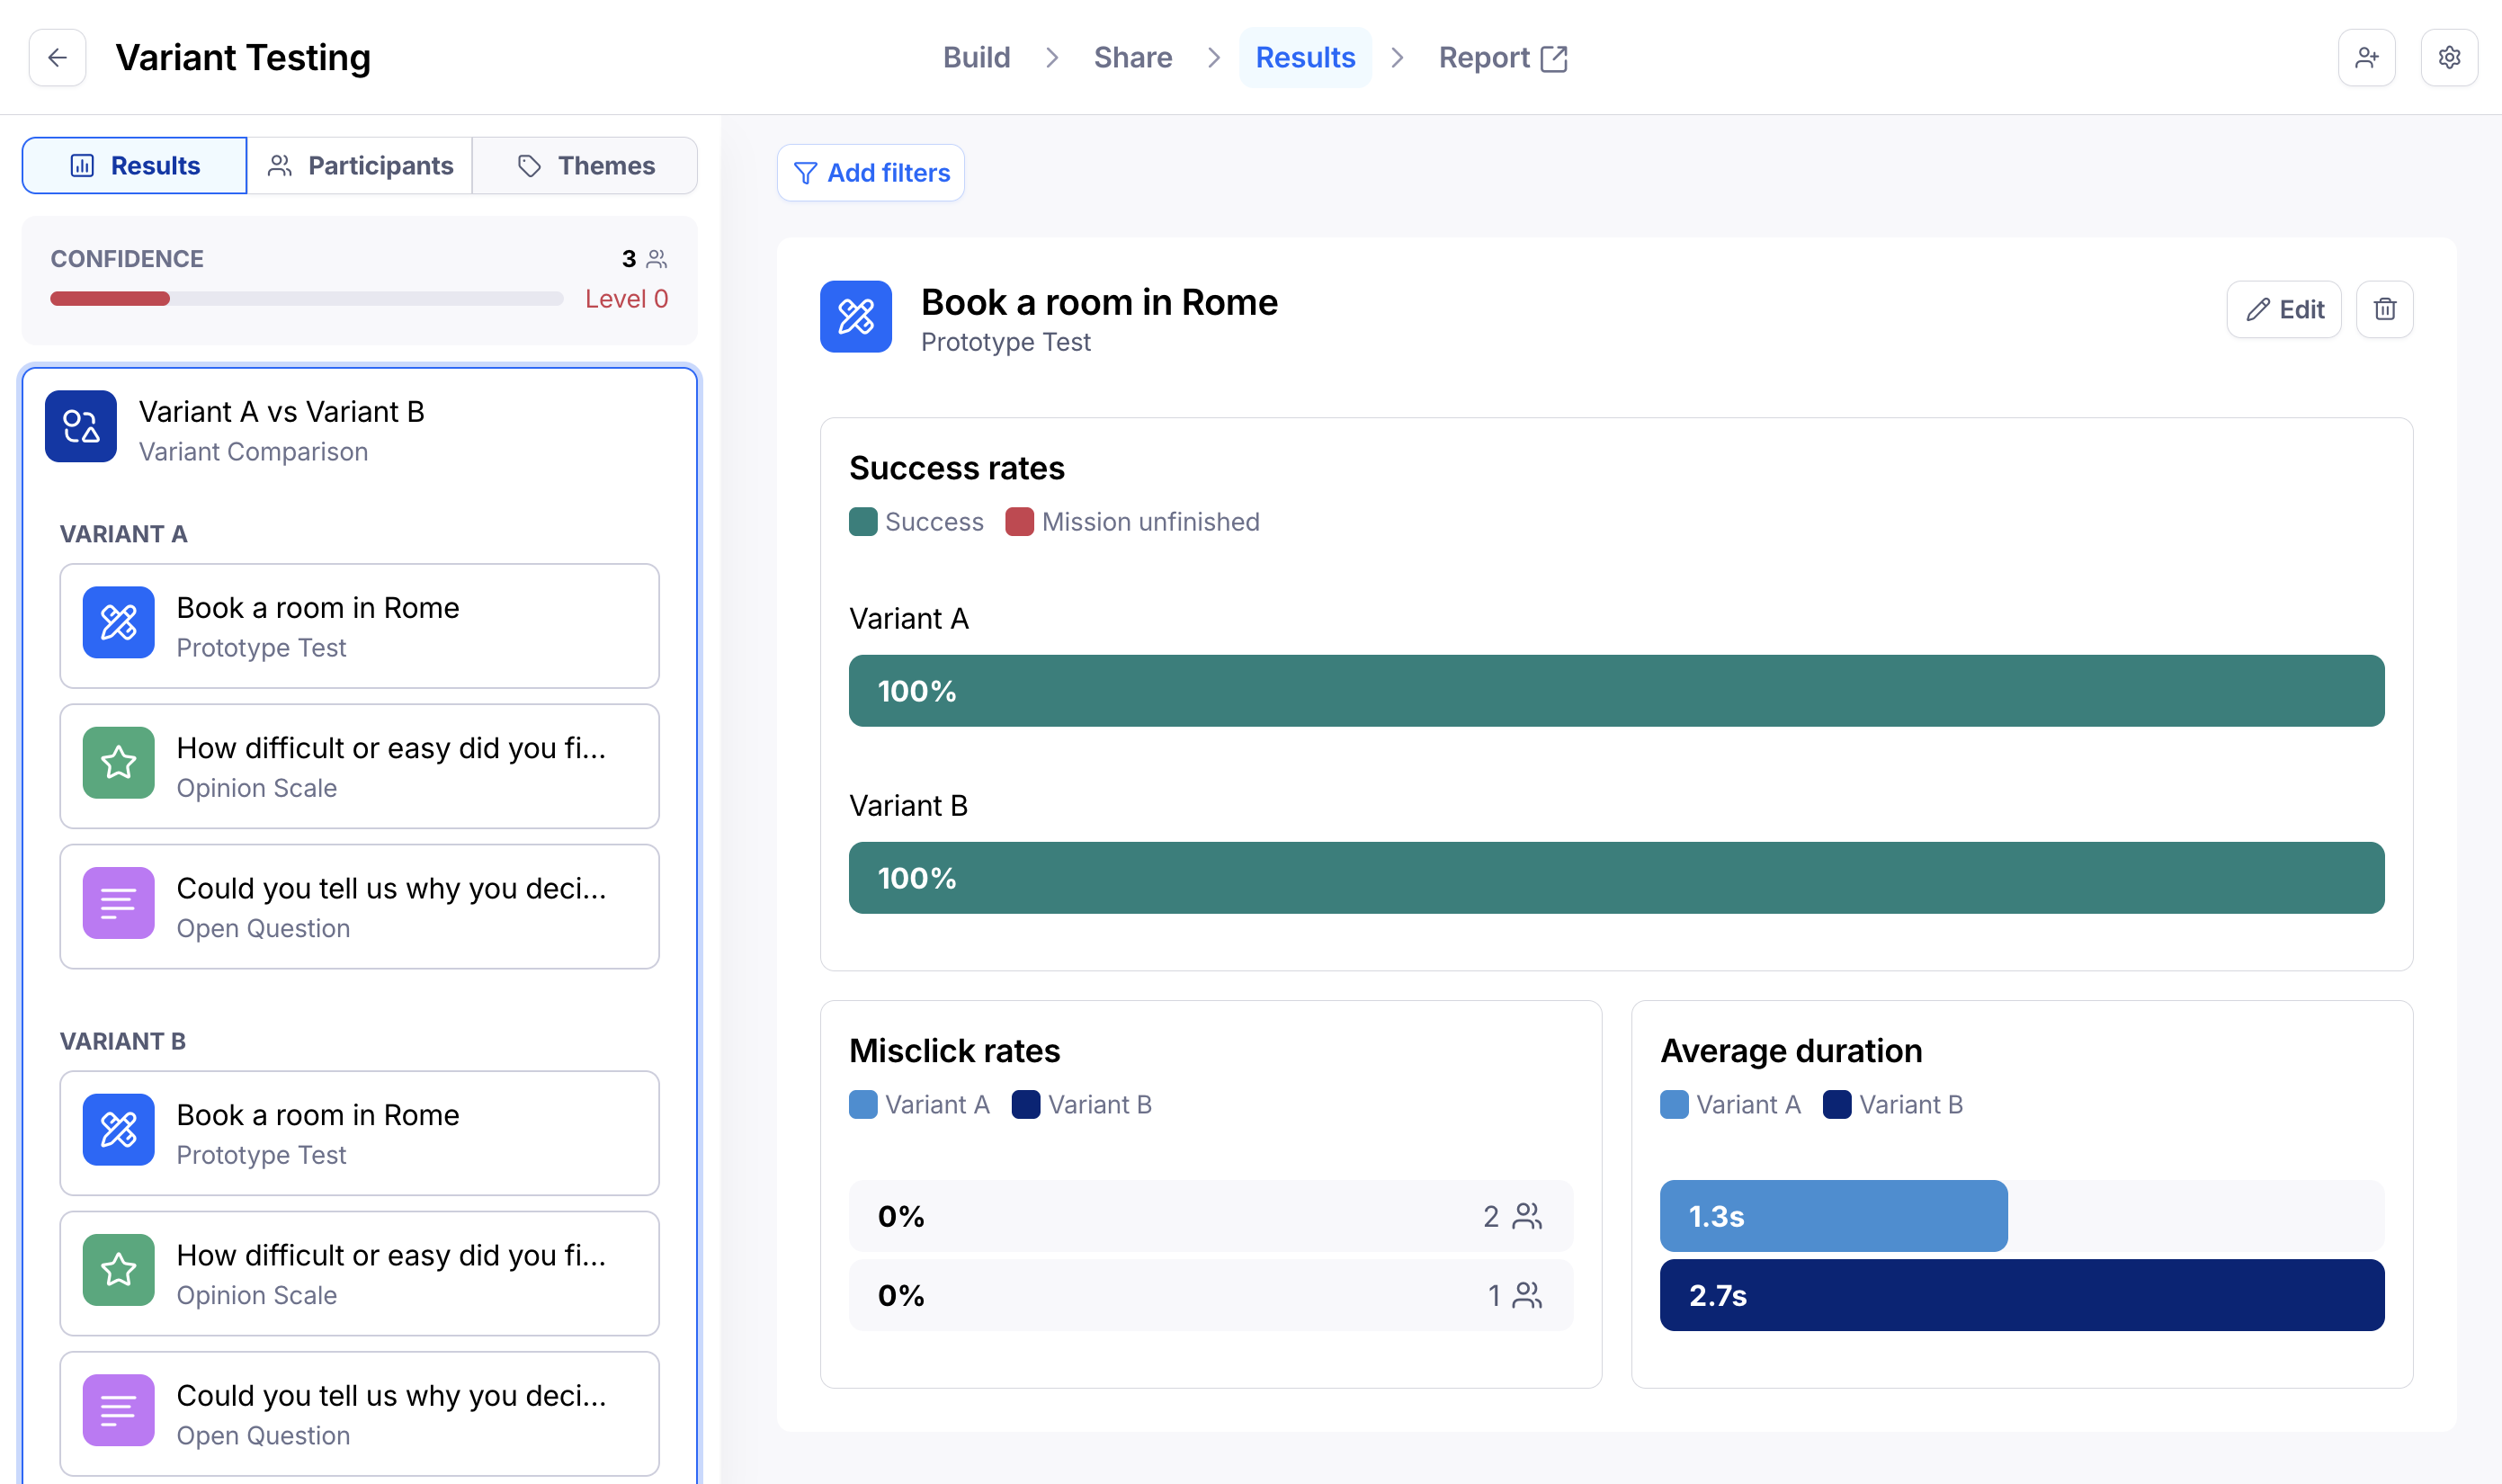
In the Results dashboard, you'll see a similar structure as in the builder. Here, the variant comparison block encompasses the blocks belonging to each variant.
For some block types (Prototype Test, Multiple Choice, Opinion Scale, Yes/No, Open Question), you can compare different versions side-by-side in one view.
For other block types, go through each block in the variant comparison to compare the results.
Learn more about analyzing results of a variant comparison block
Alternate solutions for variant comparison testing
If you don't have access to the variant comparison block, there are two alternative approaches you can use to compare design variants in Maze.
Option 1: Changing the order/version manually on the same study
In this approach, you'll use a single study with both versions (i.e. A and B).
| ✅ Advantages | ❌ Limitations |
|---|---|
| Keep everything in a single study | Only one design file can be linked per study, so both versions must live in the same file. |
| All results in one place — just compare the differences between blocks and versions | Both versions must be ready before publishing, since it's not possible to add prototypes to a live study. |
| Recruit testers from the Maze panel | Requires manually tracking respondents, with no guarantee of an equal split per version. |
Step 1: Set up your study
Set up your design file to include both versions you want to test.
Import the prototype into Maze and create two prototype blocks, one for Version A, the other for Version B.
Both blocks need to be set up using screens from the same file. Once you send the study live, you won't be able to change or refresh the file.
If you follow a consecutive approach (i.e., you'll show participants one version, then the other), at this stage, Version A will appear before Version B.
Change the start screen to select a different flow within the design file. Learn how to test multiple flows using a single Figma prototype
For exclusive evaluations (i.e., you'll only display any given participant one of the versions), you'll initially hide the block corresponding to Version B.
To hide a block, hover over the block tile, click the ••• menu, and select Hide for participants.
Step 2: Share your study & collect results (Part I)
After publishing the study, share the study link with the participants. Learn more about sharing studies
You can use URL parameters to identify the study's version or audience. For instance: ?version=AB or ?version=A
Step 3: Edit the study
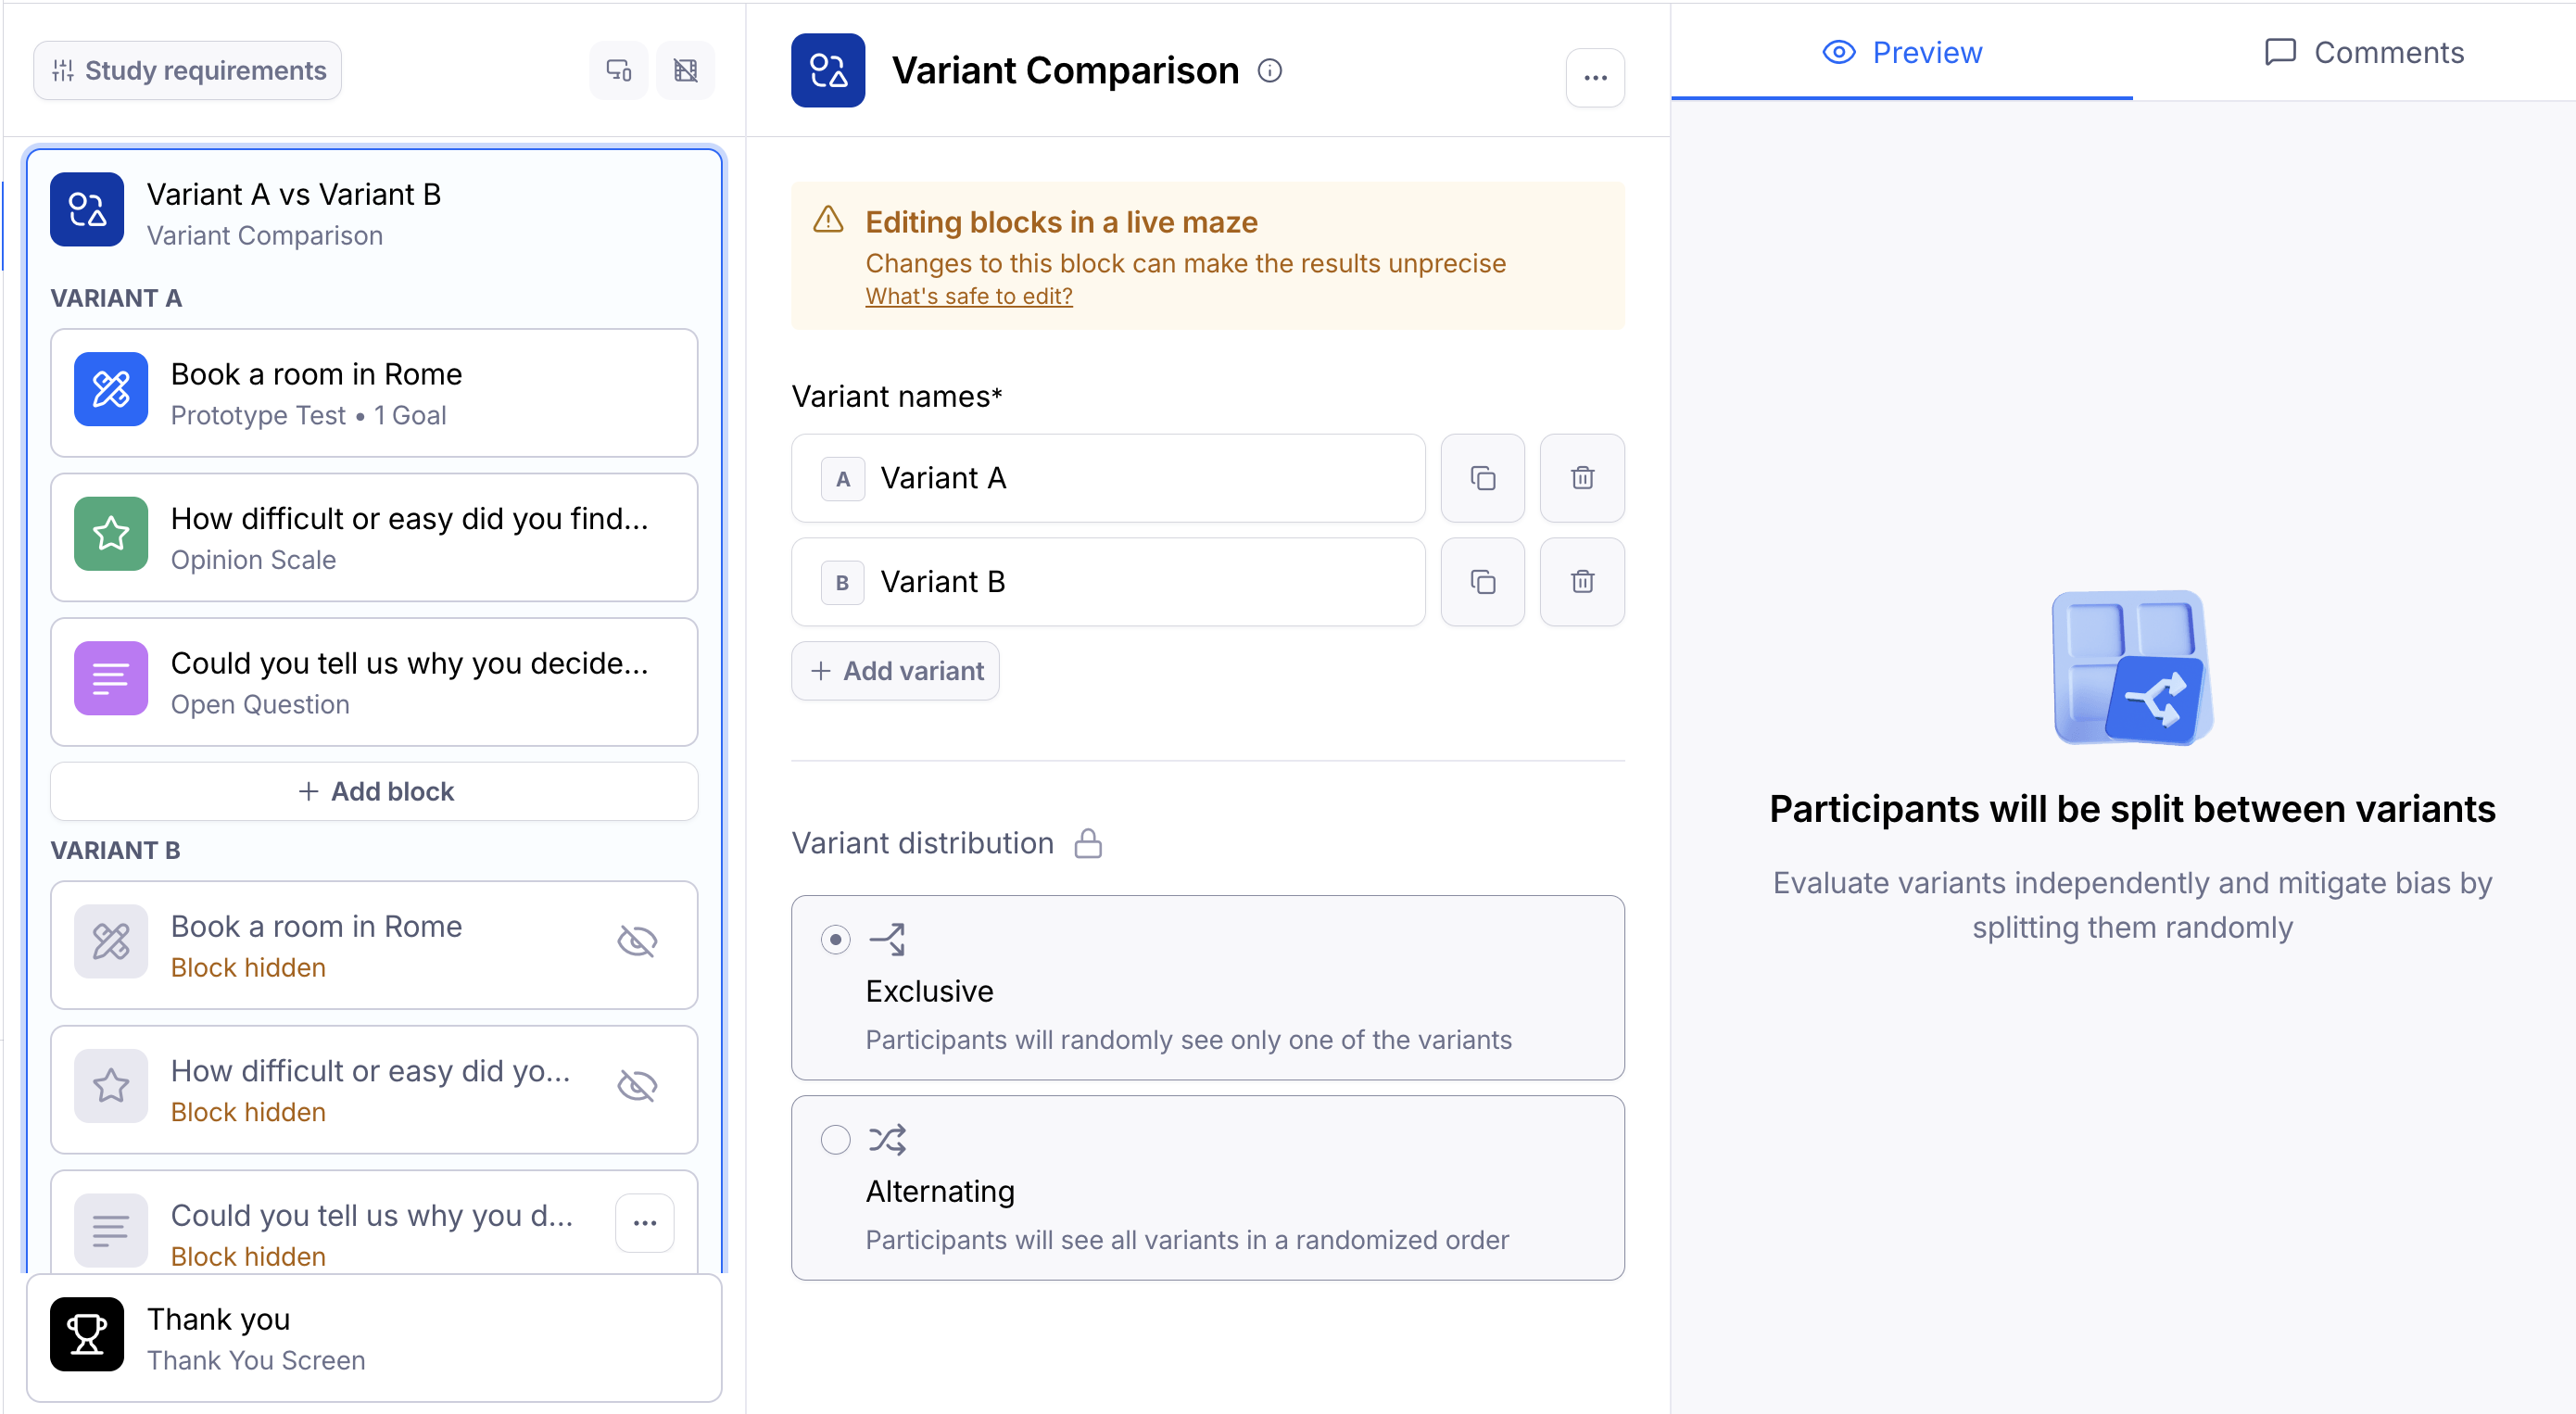
Keep monitoring the results as they come in. Once you've received enough results on that version, open the Build tab to go back to the study editor.
If you're showing both versions consecutively, change the order of the blocks so that Version B appears first.
If you're showing one version at a time, hide Version A and display Version B.
When you're ready, update the study with the latest changes.
Step 4: Share your study & collect results (Part II)
Share the link with participants again. Learn more about sharing studies
If you've used URL parameters, change them to reflect the current version. For instance: ?version=BA or ?version=B
Step 5: Analyze the results for both versions
You can now compare the results between the two versions.
If you've used URL parameters to identify the versions, they'll appear as metadata in the Results dashboard, as well as the CSV export, if you're on a paid plan.
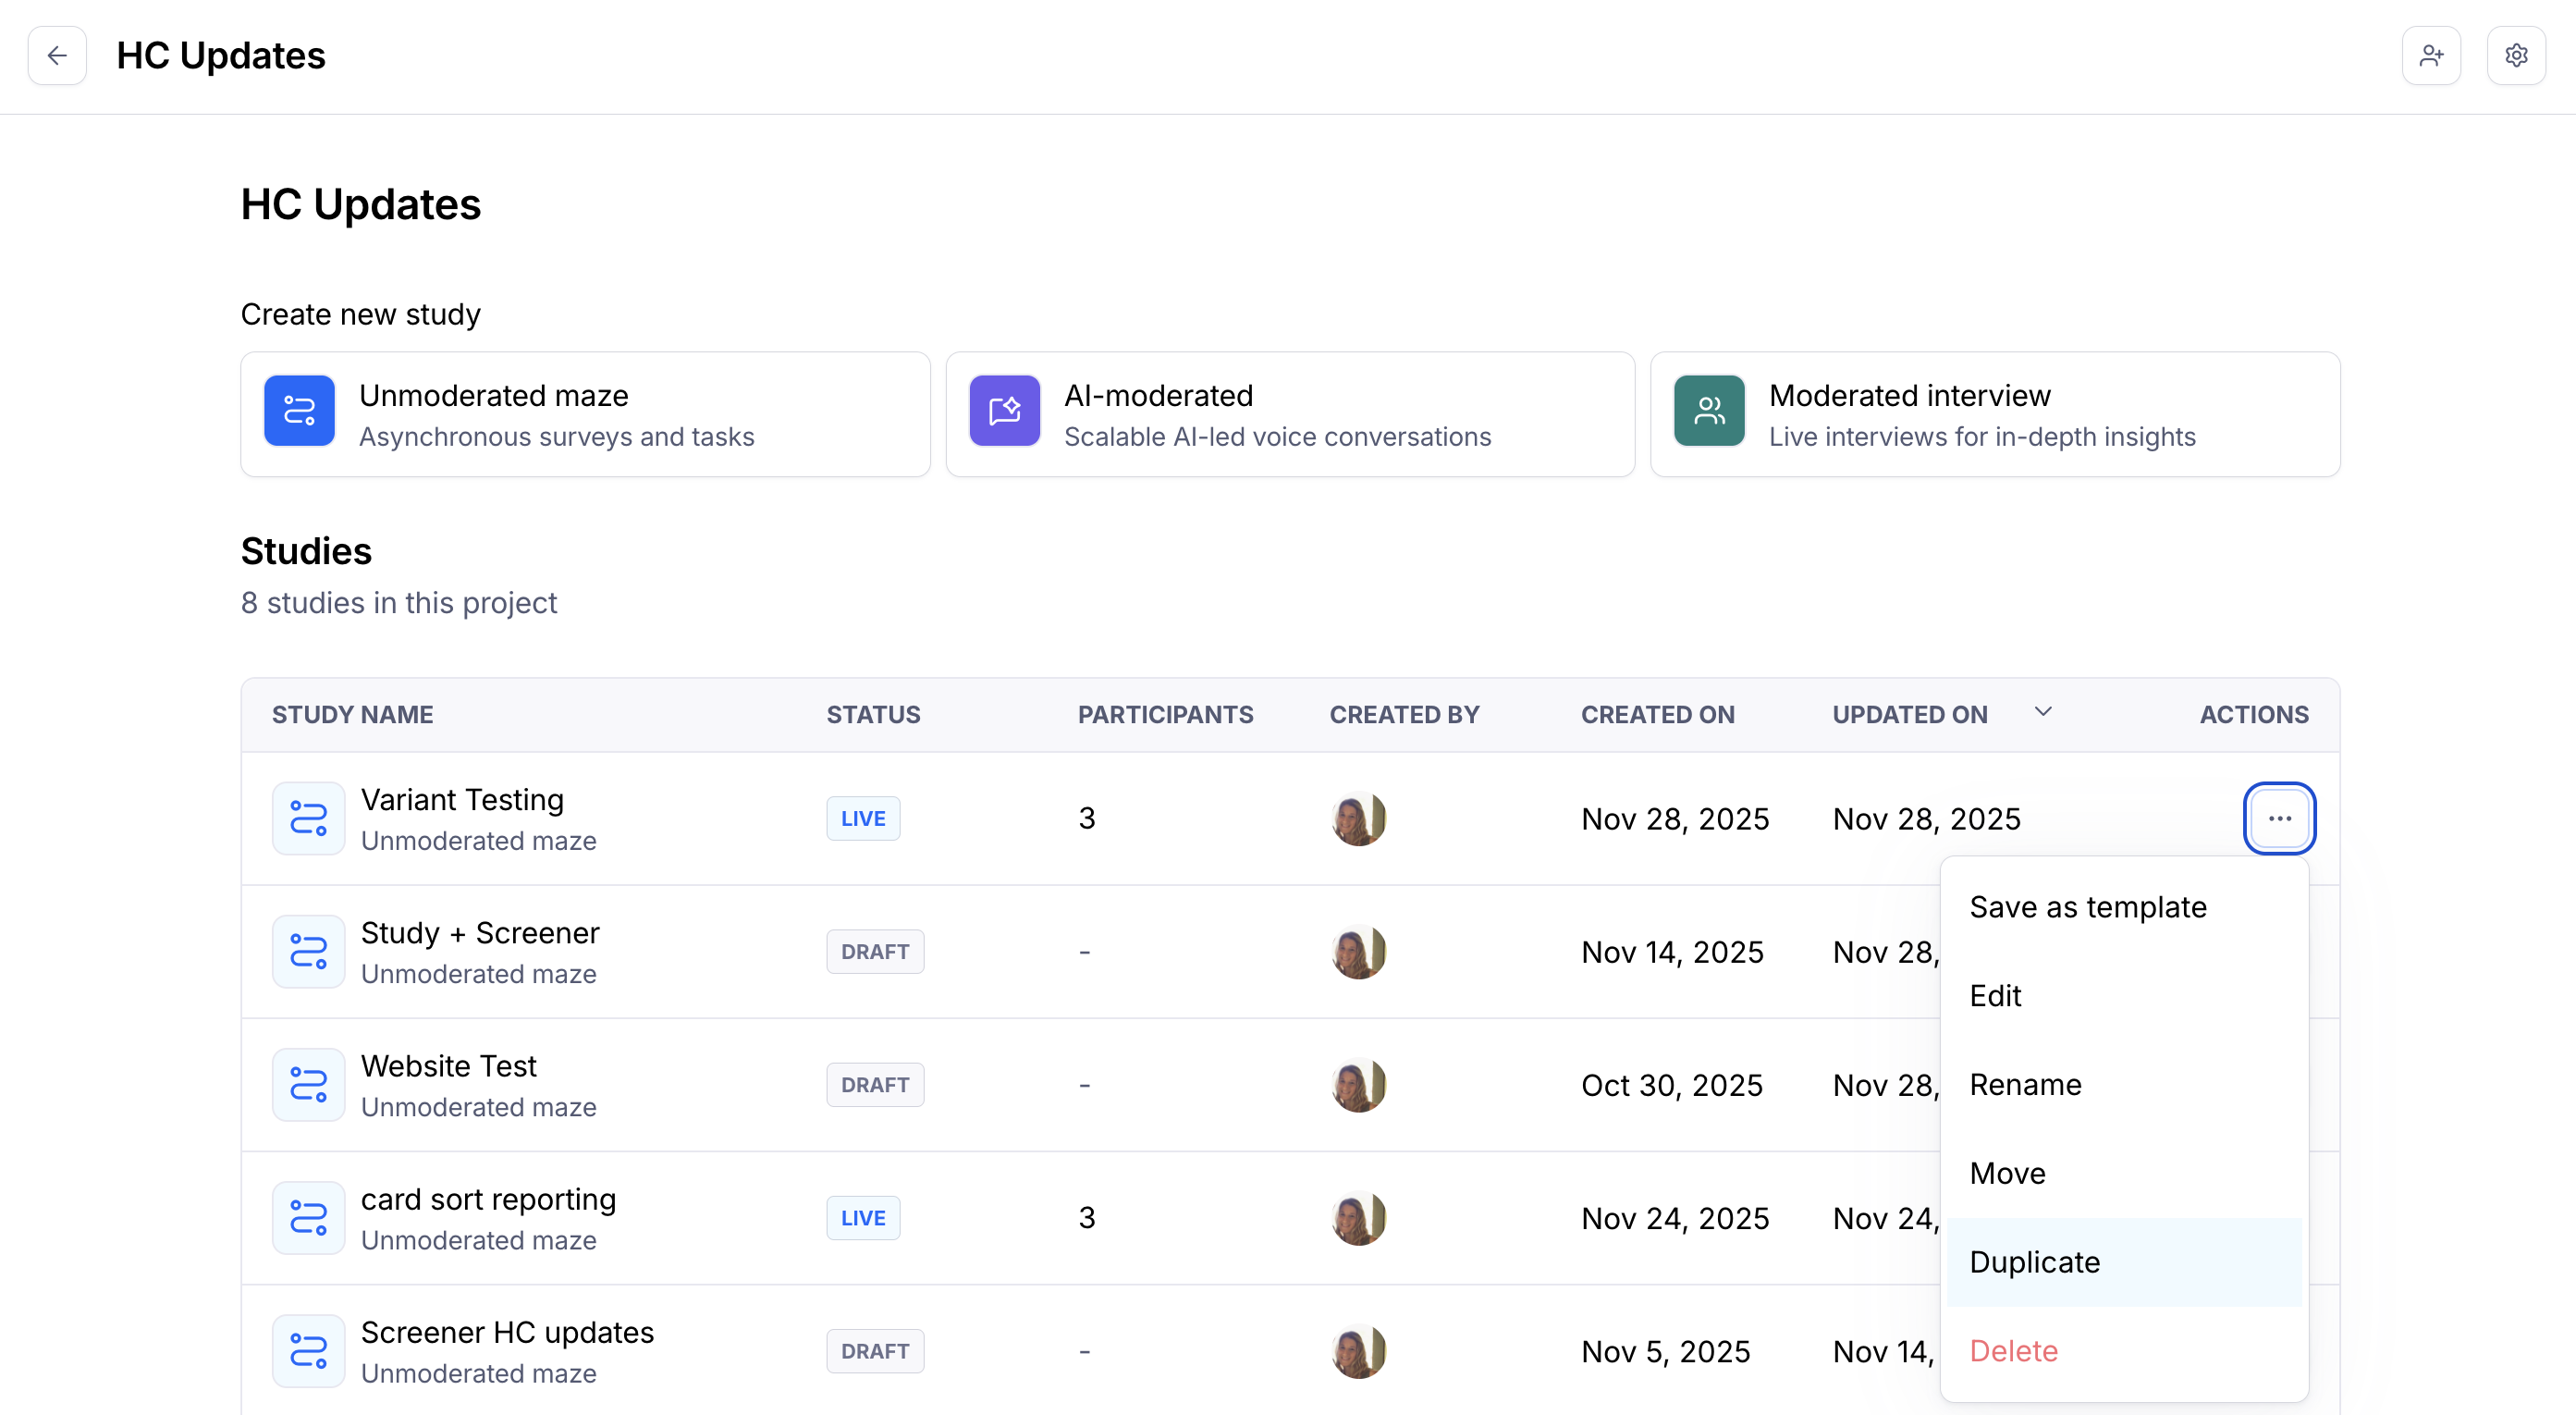
Option 2: Using the Duplicate feature to compare prototypes
In this approach, you'll use the duplicate feature to create two separate studies: one for Version A, the other for Version B.
You can either display these versions sequentially (consecutive comparison) or one at a time (exclusive evaluation).
| ✅ Advantages | ❌ Limitations |
|---|---|
| It's possible to use two separate design files. | You must take the appropriate steps to make sure that roughly the same number of participants tests both studies. |
| Distributing both studies to participants is a more manual process than the alternative approaches described in this article. | If using hired testers and placing panel orders for each study, you may get the same testers in both studies. This is especially true if you make both orders back-to-back, and/or target a more niche audience. |
| It's not possible to combine results for both studies. |
Step 1: Set up your first study
Create and set up a study for Version A.
Import the relevant file in the prototype block(s).
Step 2: Set up the second study
In your prototyping tool, create a new version of the design (e.g., change the color or the copy of the CTA button). You can either edit the existing file or use a new file altogether.
Back in Maze, duplicate the first study you created. This will create a new study with the same missions and questions as in version A. This new study will also include the latest design changes.
Open the duplicate study — this will be Version B. Here, you have a couple of options:
I. Use the same prototype
If you change the original prototype and then duplicate the study, the new study will also include the latest design changes. This is a good option when you want to use a different version of the same prototype you previously imported.
This option allows you to preserve the paths you previously set.
Refresh the prototype in Version B to get the latest changes you've made to the prototype.
II. Unlink the prototype and import a new one
If you want to use a different file in version B, you can unlink the current prototype after duplicating. This will allow you to use a different prototype for version B. Learn more about unlinking prototypes
Keep in mind this option requires you to redo all paths across all prototype blocks, since unlinking a prototype also irreversibly removes all previously defined paths.
Step 3: Share your studies & collect results
After publishing both studies, share the links with the participants. Learn more about sharing studies
At the moment, it's not possible to randomize which study participants will see. This means that you must take the appropriate steps so that both versions are evenly distributed among the participants:
Link sharing: Split your audience into two and send different communications for each version. Additionally:
- You can use URL parameters to identify the version or audience of the study before manually distributing them to participants (e.g.
?version=Aand?version=B). - While we don't directly support or endorse them, there are also third-party custom URL tools you can use to distribute study share links — for instance, Linkly, or Nimble Links.
Panel: If using our panel and you are an Enterprise plan customer, you can toggle Exclude past participants to on and select from two exclusion options — From this project or From any project in your team.
Prompt: When sharing studies via an in-product prompt, you should add a parameter to the prompt URL, or choose different Amplitude cohorts as the target audience.
Reach: Assigning alternating testers with either an 'A' or 'B' tag allows the creation of separate segments. When creating a campaign (one for study A, the other for study B), you can then use each of these segments as recipients.
Step 4: Analyze the results for both versions
When testing is done, compare the results from both studies.
While it's not possible to directly consolidate results for both studies, you can embed both reports side-to-side in your tool of choice to easily compare them.
If you're on a paid plan, you can also export and combine the CSV files with the results from both studies.
FAQ
Are variant comparison and A/B testing the same?
A/B testing and variant comparison both involve comparing different variations, so these terms are often used interchangeably by researchers. However, A/B testing and variant comparison are distinct in their focus and methodology.
A/B testing (also known as split testing) compares the performance of two variants in a live production environment. This method splits organic users into a control group (version A) and a treatment group (version B), with assignment randomized to minimize bias. Quantitative metrics such as click-through rates, bounce rates, and session duration are compared to determine which variant performs better. Statistical significance is crucial in A/B testing to determine whether differences in metrics between variants are conclusive rather than merely coincidental.
Variant comparison is a broader term that encompasses evaluating multiple variations or designs. It involves evaluating and analyzing different design elements, layouts, or concepts to identify the most effective or appealing option. Variant comparison can involve both qualitative analysis, such as direct user feedback, and quantitative analysis, such as prototype metrics measuring user interactions.
Additional resources
- For additional tips, read our blog post: From idea to impact - Your guide to A/B testing prototypes
- See this case study to learn how the team at Braze validated their designs with an A/B test using Maze.
Still need help?
If you have any questions or concerns, please let our Support team know — we'll be happy to help!
Attachments:
d222a8f3-90da-4d94-ac3b-a1008215d1ae.gif
startesting_15xopy3.gif
maze-builder-mission-change-start-screen.webp